-
Automne 2023 (eng)
Automne 2023
(Autumn 2023)
This tutorial is by Béa
Thank you Béa, for allowing me to translate your tutorial
This tutorial is protected by copyright
The material provided is protected by the authors of the tubes
It is prohibited to appropriate or modify the original and / or signatures.
Any dissemination without written authorization is prohibited.
Original Tutorial On Here
My Version: identical colors, unknown character, Thanks!
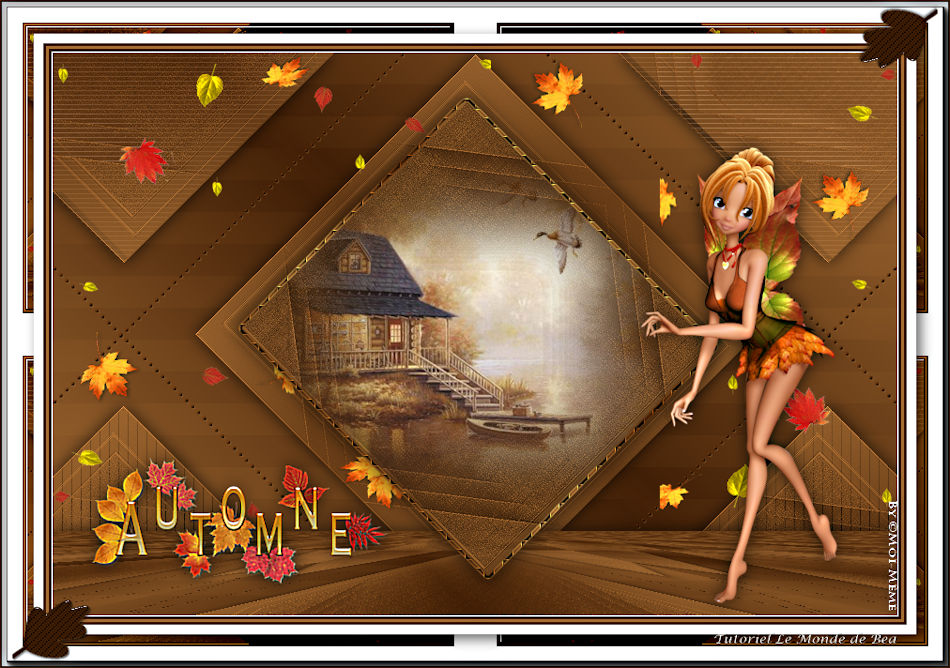
Material On Here
Duplicate and remove signatures from materials before using them
Double click on the preset

it installs itself automatically
Plugins:
Filters Unlimited : &<Bkg Kaleidoscope
Mura's Meister
Carolaine and Sensibility
AP 01
Alien skin eye candy 5 Impact
1.
Put the colors:
Foreground, Cor 1 #a76e36
Background, Cor 2 #421f082.
original colors:

3.
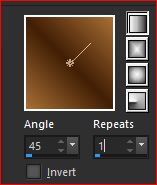
Prepare a Linear gradient:
4.
Load the Alpha_Automne2023 file
Window/Duplicate
Close the original, let's work on the copy
Fill with the gradient5.
Layers/duplicate
Image, Mirror, Mirror horizontalLoad the mask NarahsMasks_1791
Layers, New masque layer from image:

Effects , edge effects, enhance more
Layers, merge groupe
Adjust, sharpness, sharpen more6.
Effects, plugins: Filters Unlimited - &<Bkg Kaleidoscope> 4QFlip UpperL, how to opening
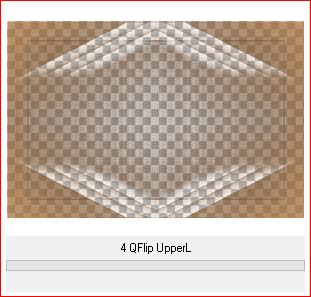
Image, Resize at 80% (all layers unchecked)
Effects, plugins: Filters Unlimited - &<Background Designers IV> sf10 Slice N Dice, how to opening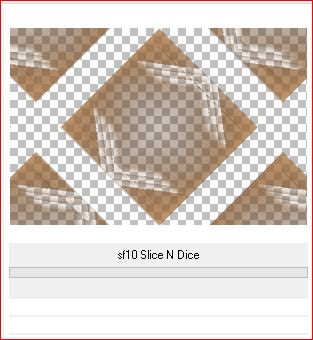
7.
Selections , load a selection from alpha channel, sélection 1
Selections , promote selection to layer
Load Nena's landscape or yours
Edit/copy
*On your work: paste as a new layer
Image, Resize at 50% (adapt to your tube)
Place well, inside the selection
Selections / Invert
DELETE8.
Selections / Invert
Selections, Modify, Select the selection borders:
Layers, new raster layer
Preencher com este novo gradient :
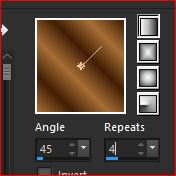
! clique várias vezes par o aplicar!
9.
Effects, textures effects, weave:
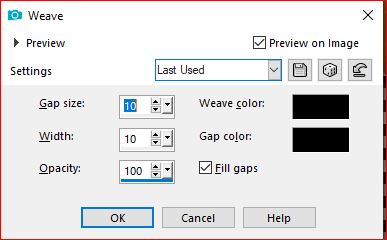
Effects, Edge effects, enhance more
Effects 3D, drop shadow 0 / 0 / 75 / 25 black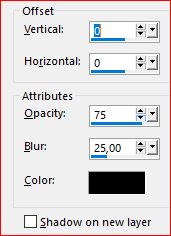
Selections, select none
10.
Layers, merge down two times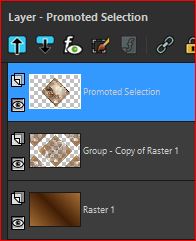
Effects 3 D drop shadow, as before (memorized)
11.
On the Raster 1 layer
Selections, load a selection from alpha channel, sélection 2
Effects, plugins: Dsb flux - Linear Transmission:
Sélections/ Invert
Selections, promote selection to layer
Effects 3D drop shadow, as before
Select none12.
We are on the second layer from the bottom (promoted selection 1)Selections, load a selection from alpha channel, sélection 3
Effects, plugins: Carolaine and Sensibility - Cs-texture, how to opening

Select none
13.
Stay on this layer
Selections, load a selection from alpha channel, sélection 4
Effects , plugins: Ap 01 (Innovations) - Lines - Silverlining: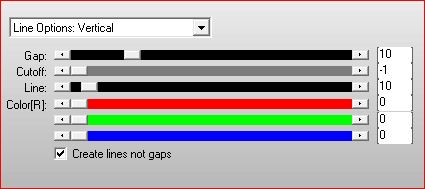
Select none
14.
Actual layers: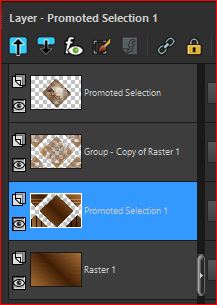
15.
Activate the top layer of layers
Layers, new raster layer
Selections, load a selection from alpha channel, sélection 5
Fill with color 2 (Zoom if necessary)
Effects 3D, Inner bevel, setting: default
Select none
Effects 3D, drop shadow 1 / 1 / 50 / 1, Color 1
Layers, arrange, move down16.
Close the layer on top of the layer (landscape)(*click on the eye in the layers palette)
Layers, merge visibles
Layers/Duplicate
Reopen the landscape layer ( *click again)

17.
We are on a layer copy of merged
Effects, plugins: Mura's Meister - Perspective tiling:
Effects 3D, drop shadow 0 / 0 / 75 / 25 , black
18.
Load the tube Feuilles_automne, copy
*paste as a new layer
Activate the pick tool (letter K), put it like this:
Position X 0
Position Y 0
M key to deselect19.
Activate the top layer of layers
Load the tube personagem (PngItem_5296850) or your's, copy
*paste as a new layer
Image, Resize a 65% (adapt to your tube)
place it to the right (see the final example)
Effects 3D , drop shadow, as before20.
Load the tube titre, copy
* paste as a new layer
place it at bottom left (see the final example)
Effects, 3D drop shadow, as before21.
Image, Add borders, symmetric:
1 px white
3 px Color 2
3 px Color 1
3 px Color 2
10 px white
Selections, Select all
Image, Add borders, symmetric: 35 px white
Selections / Invert
Effects, plugins: Filters Unlimited - &<Bkg Kaleidoscope> Cake Mix, how to opening
Selections/ Invert
Effects 3D, drop shadow 5 / 5 / 60 / 20 , black
Select none22.
Prepare a new linear gradient:
Put it in the background, click on the arrows like this:
( original screenshot)

Activate the Text tool, Font: AutumnDays-PersonalUse-Clipart / Size 128

Each letter on your keyboard, of your choice, corresponds to an Autumn icon
for the author and me: "e"
right click on the layers palette: convert to raster layer
Place it in bottom left corner
Effects, plugins: Alien skin eye Candy 5 Impact , Glass, apply the preset "glass_automne2023"Dados se nécessario (original screenshot):

Effects 3D Ombre portée 1 / 1 / 50 / 1 , black23.
Layers/Duplicate
Image, Mirror, Mirror horizontal
Image, Mirror, Mirror vertical
Layers, merge down24
Effects , textures effects, weave : new data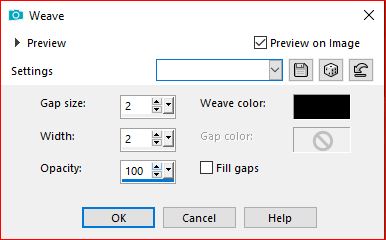
25.
On the raster 1 layer
Effects, plugins: AAA Frames - Foto Frame:(original screenshot)

26.Sign and add the author's watermark
27.
Image, Add borders, symmetric: de 1 px , Color 2
Resize width at 950 px
Adjust, sharpness, unsharp mask, setting: softSave as jpeg
translation by:
Thank you Kika
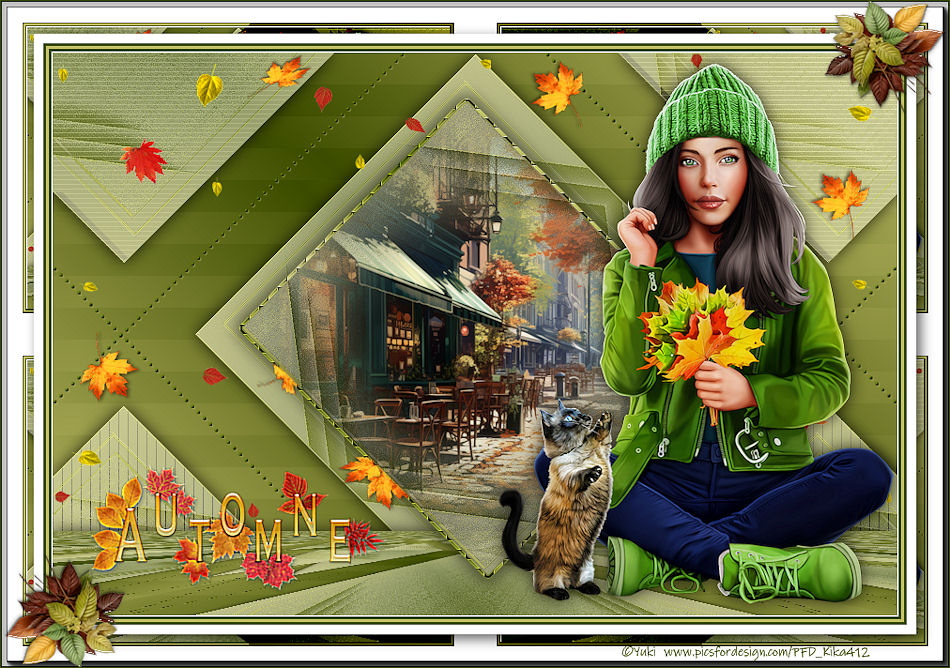
Inédits de ma conscience


