
-
Par ©Moi-Même le 8 Mars 2024 à 22:14
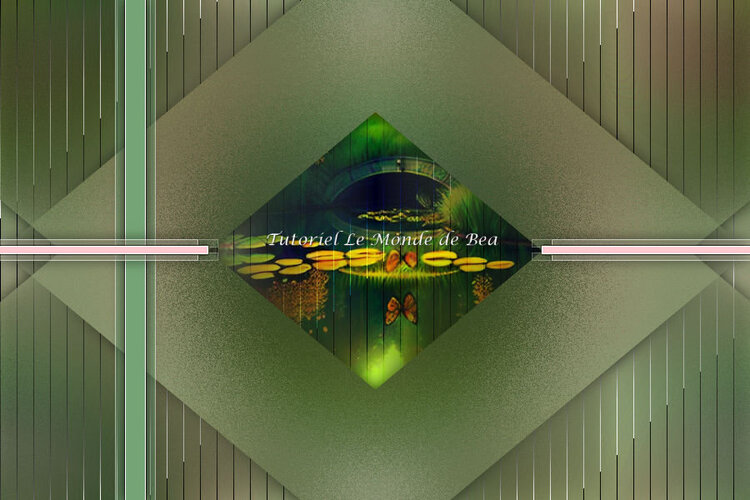
This tutorial is by Béa

Thank you Béa, for allowing me to translate your tutorial
This tutorial is protected by copyright
The material provided is protected by the authors of the tubes
It is prohibited to appropriate or modify the original and / or signatures.
Any dissemination without written authorization is prohibited.
Tutorial On Here
Conform version, original On Here
My version: personal tubes

Material On Here
Plugins:
AAA Filters
Toadies
Filters Unlimited
Ap Lines SilverLining
Mura's Meister
Alien skin eye Candy 5 Impact
Preparation:
Remove the watermark from the tubes before using them
Guide:
1.
Original colors:

Foreground, Color 1, #ffcad0
Background, Color 2, #75a4762.
Load the file Alpha_souris
Window/ duplicate, close the original and continue with the copy3.
Load the tube souris d'Ema (mouse)
Edit/Copy
*On your work: Selections, select all
Edit/paste into selection
Selections , select none4.
Effects, Image effects, seamless tilling: setting/Default
Adjust, Blur, Radial: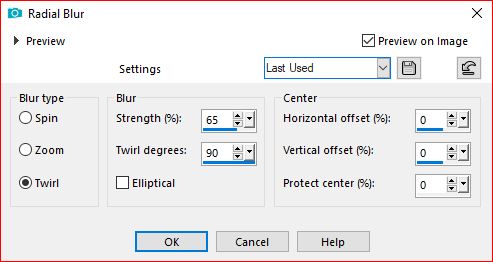
Layers/duplicate
Image, Resize a 85% all layers unchecked
Layers, merge down5.
Effects, Image effects, seamless tilling, setting: Default
Adjust, blur gaussien radius at 30
Edit/repeat gaussien blur
Layers, merge all6.
Right click on the layers palette - Promote background layerAdjust, sharpness, sharpen more
7.
Effects, plugins:AAA Filters - Custom : one click on landscape: ok
AAA Filters - Custom : one click on noise (I also clicked on Reduce) : ok
Layers/Duplicate
Image, Mirror, mirror horizontal
8.
Effects, plugins: Toadies - Blast 'em! , How to opening
Edit/ repeat, Toadies, Blast 'em!
9.
On the raster 1 layer (Layer below)
Effects, plugins: Filters Unlimited , Tramages, Tow the line:
10.
Back over the top layerLoad the Astrid masker 113
Layers, new mask layer, from image
Layers, merge group
11.
Effects, Reflection effects, Rotating mirror, setting : Default
Effects, Filters Unlimited - &<Bkg Designer sf10 I> - Corner Half wrap:
Effects 3D, drop shadow: 0 / 0 / 75 / 25 black
12.
On the Raster 1 layer
Load the landscape misted d'Ema
Edit/ Copy
*Paste as a new layer13.
Move the misted until you see the part of the landscape you want to keep
Selections , load a selection from alpha channel, sélection 1
Selections , Invert
DELETE
Selections, select none14.
Layers, properties, Blend Mode, hard light
On the top of the layers
Selections , Load a selection from alpha channel, sélection 2
Selections, Promote selection to layer
Select none15.
Image, Resize at 25%, all layers unchecked
Effects, plugins: Filters Unlimited, &<Bkg Kaleidoscope>, Kaleidoscope Heart - both settings at 255
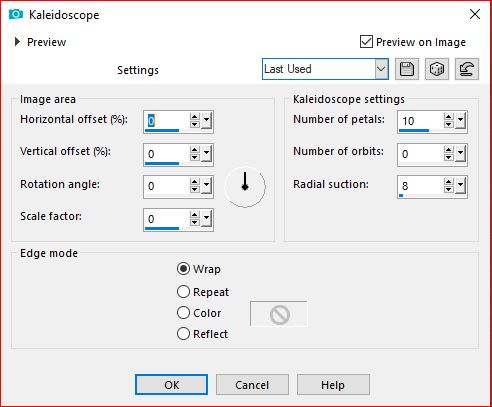
Effects, Reflections effects, Kaleidoscope:
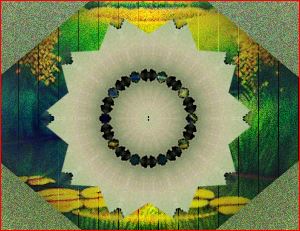
result:
Image, Resize at 50% , all layers unchecked
Edit/ Cut
Edit/paste as a new image, leave it for later
You can save it as png just in case16.
Return to your original work
We are on the top layer
Selections, Load a selection, from alpha channel, sélection 3
Fill in with color 1
Select none17.
Layers, Duplicate
On the layer below (original)
Effects , plugins: Unlimited - &<Bkg Designer sf10 I> Cruncher
18.
On the layer above
Layers, merge down (the two lines of color 1)
Effects, Edge effects, enhance more
Adjust, sharpness, sharpen more
Effects 3D , drop shadow, as before19.
On the layer below
Layers, new raster layer
Selections, load a selection from alpha channel, sélection 4
Fill in with color 2
Select none20.
Layers, Duplicate
Activate the layer belowEffects , plugins: Unlimited - &<Bkg Designer sf10 I> Cruncher , as before
Activate the layer above (the copy)Effects, 3D drop shadow, as before
Layers, merge down
Effects , Edge effects, enhance more21.
Current Layers:

Original result:
22.Layers, Duplicate
Image, Mirror horizontal
Layers, merge down
Effects, distorsion effects, wave :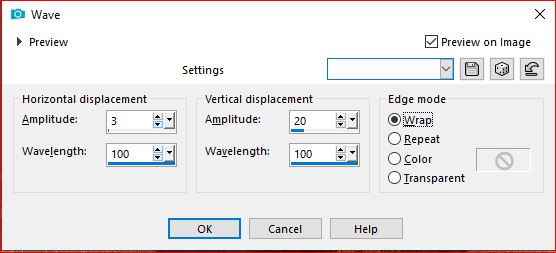
Duplicate
Image , Mirror horizontal
Layers, merge down23.
Activate the layer at the top of the layers
About the "flower" that you left aside, copy
*On your work: paste as a new layer
Image, Resize at 85% , all layers unchecked
Activate the pick tool " K key" , place it: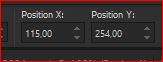
Position X 115
Position Y 254
M Key to deselect24.
Layers, Duplicate
Image, Mirror horizontal
Layers, merge down25.
Effects , plugins: Alien skin eye Candy 5 Impact - Glass - Color 2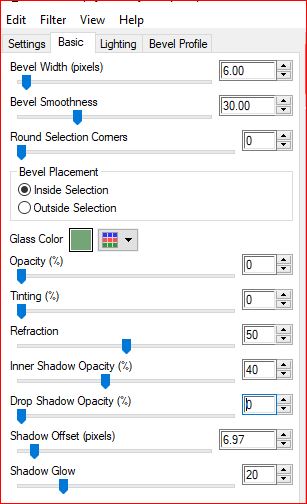
26.
On the Raster 1 layer
Layers, Duplicate
Effects , plugins: Mura's Meister , Perspective tiling:
Effects 3D drop shadow, as before
27.
Layers, Duplicate
Image, Mirror vertical28.
On the Raster 1 layer
Layers, new raster layer
Fill with color 1Load the Narah mask
*Layers, new mask layer from image:
Layers, merge group
Layers, Duplicate
Image, Mirror horizontal
Merge down
29.Layers, Duplicate
Image, Mirror vertical
Merge down30.
Layers, properties, Blend mode soft light
Effects , edge effects, enhance more
Adjust, sharpness, sharpen more31.
Edit/Copy special, copy merged32.
On the top layerEdit/paste as a new layer
Image, Resize at 25% , all layers Unchecked
Image, free rotate:
Selection tool "S" - layer opaque : to select

33.
Effects , plugins: AAA Filters - AAA Framer(Stroke Unchecked)

34.
Layers, new raster layer
Activate the main tube (mouse) again, copy
*Paste into selection
Merge down35.
Effects , plugins: AAA Framer, as beforeSelect none
Image - Free rotate - Right at 15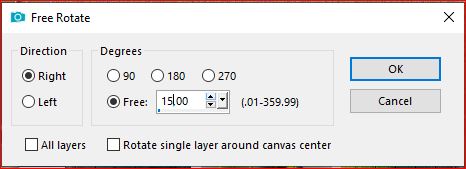
Activate the pick tool "K" , place it:
Position X 670
Position Y 45
(M)36.
Layers, arrange, move down
Duplicate
Image , Mirror horizontal
Activate the pick tool "K" , place it:
Position X 670
Position Y 294
(M)37.
Layers, merge down
Effects 3D, drop shadow, as before38.
Activate the layer at the top of the layers
Edit/paste as a new layer ( memorized tube)
Image, Mirror horizontal
Image, Resize at 115% all layers unchecked
Adjust, sharpness, sharpen
Put as on the example39.
Layers, Duplicate
On the layer below: adjust, Blur gaussien, radius at 30
Layers, properties, Blend mode, Multiply
40.Image - Add borders, symmetric:
1 px Color 1
3 px Color 2
1 px Color 1
5 px Color 2
15 px white
Select all41.
Image - Add borders, symmetric:1 px black
5 px de Color 1
Selections / Invert
Effects , plugins: Ap Lines - Silverlining - vertical - how to opening
42.
Effects , plugins: Ap Lines - Silverlining , switch to horizontal
Selections/Invert
Effects 3D drop shadow, as before
select none43.
Image - Add borders, symmetric: 25 px white44.
Sign and add the author's watermark45.
Image - Add borders, symmetric: 1 px Color 2
Image, Resize, width at 950 px
Adjust, sharpness, unsharp mask, setting : SoftSave as jpeg
Translation by:

 votre commentaire
 Suivre le flux RSS des articles de cette rubrique Suivre le flux RSS des commentaires de cette rubrique
Inédits de ma conscience
-
O crédito das imagens utilizadas
pertence ao devido Autor
Os meus tutoriais e traduções são protegidos por:

Interditos de qualquer difusão sem a minha autorização
Agradeço o respeito por o meu trabalho.

-


