-
Par ©Moi-Même le 10 Novembre 2022 à 21:29
Naise M.
This tutorial is by Béa
Thank you Béa, for allowing me to translate your tutorial
This tutorial is protected by copyright
The material provided is protected by the authors of the tubes
It is prohibited to appropriate or modify the original and / or signatures.
Any dissemination without written authorization is prohibited.
Original Tutorial : On Here
Author's Note:
This tutorial is dedicated to designer Naise Minas, thanks to her for allowing me to translate her tutorials
Material:On Here
Plugins:
Ap Lines - Carolaine and Sensibility -
Alien skin eye Candy 5 Impact - Unlimited -
AAA Filters
Version according to the original:

1.
Original colors:
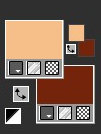
Foreground, color 1 #f5be88
Background, color 2 #75240e2.
Load the Alpha_NaiseM
Widow/Duplicate, close the original, work on the copy
3.
Load the woman tube (or yours)
Edit/copy
* On your work: Selections, select all
Edit/paste into selection
Selections, select none4.
Effects, Image effects, seamless tilling, setting: Default
Adjust, Blur, Radial Blur:

Effects, Edge effects, enhance more
Layers/Duplicate
Layers, merge down
Adjust, sharpness, sharpen more5.
Layers, new raster layer
Fill with color 2Load the NarahsMasks_1740
Layers, new mask Layer, from image: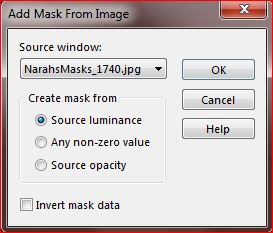
Layers, merge group
6.
Selections, load a selection, from alpha channelLoad sélection 1
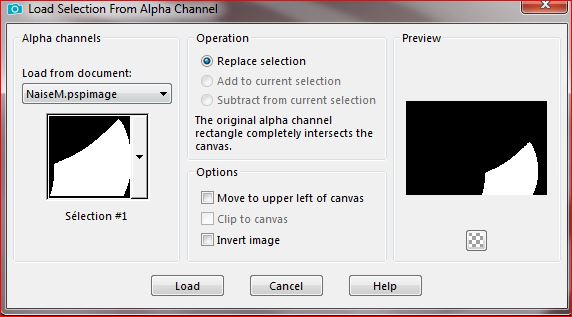
Selections, promote selection to layer
Effects, plugins: Ap Lines - Silverlining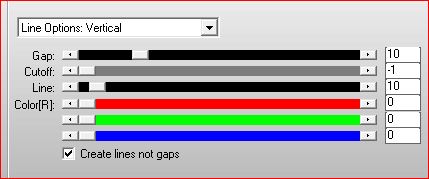
Selections, select none
Effects 3D drop shadow 0 / 0 / 75 / 25 , black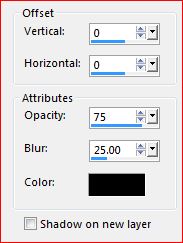
7.
On the layer belowSelections, load a selection, from alpha channel
Load sélection 2
Selections , promote selection to layer
Effects, plugins: Carolaine and Sensibility - CS-LDots: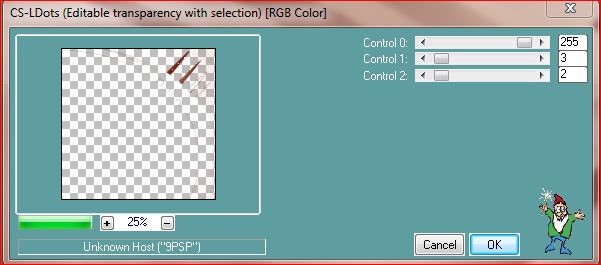
Select none
Effects 3D , drop shadow, as before8.
On the layer below
Selections, load a selection, from alpha channelLoad sélection 3
Selections, promote selection to layer
Effects, textures effects, weave: black
Select none
Effects 3D , drop shadow, as before
Adjust, sharpness, sharpen more9.
On the layer below
Effects, Edge effects, enhance more
Layers, propreties, Blend Mode , Multiply10.
On the layer Raster 1
Load the tube Deco_1
Edit/copy
* On your work: Edit/paste as a new layer
Activate the Pick tool "K" , put it:
Position X 424
Position Y 0
M Key, to remove selection11.
Activate the top layer of layers
Load the tube Deco_2
Edit/ Copy
* Paste as a new layerPick tool "K" , put it:
Position X 0
Position Y 0
(M)
Selections, load a selection, from alpha channel
Load sélection 4
Selections , Modify, Contract at 10
DELETE12.
Layers, new raster layer
Copy, once more, the woman tube
* Paste into selection13.
Add a new raster layer
Effects 3D, cutout:
Select none
Layers, merge down14.
On the layer below (framing)
Effects, textures, weave, as before
On the layer below, merge down
Effects 3D , drop shadow, as before15.
Layers (original) :
16.Layers, new raster layer
Selections, load a selection, from alpha channelLoad sélection 5
Fill in white
Selections, Modify, Contract at 10
DELETE17.
On the Raster 1 - Promote selection to layer
Layers, arrange, bring to top
Arrange, move down
Effects , plugins: Alien skin eye Candy 5 Impact - Glass - Preset Clear
Select none
18.
On the layer below (framing)
Effects, textures, weave, as before
Layers, merge down
Effects 3D, drop shadow, as before19.
On the Raster 1
Effects, plugins: Unlimited, Funhouse, Loom , how to opening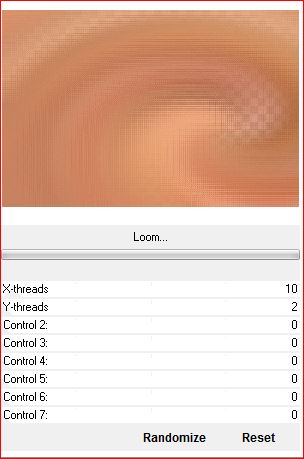
Edit/repeat unlimited (Loom)
Adjust, sharpness, sharpen more
Effects, plugins: AAA Filters - Custom - Landscape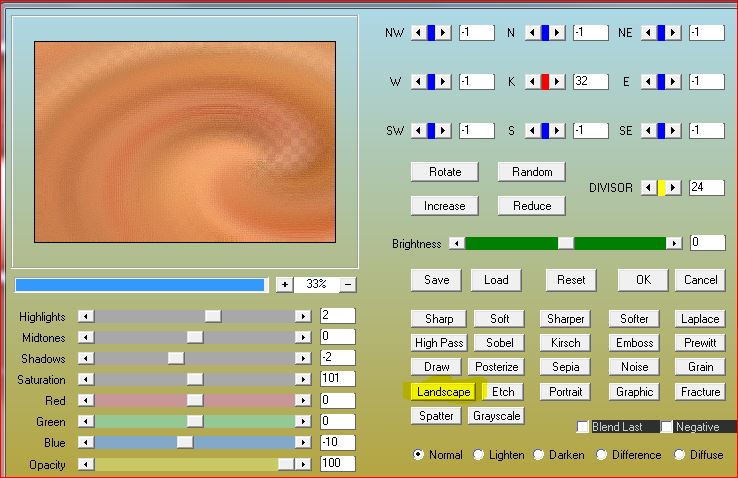
20.
Image, Add borders, symmetric:1 px de color 2
20 px white
Layers/ Duplicate
Image, Mirror, horizontal
Image, Resize at 25% all layers unshecked
Effects, geommetric effects, Skew:
Pick tool "K" , put it:
Position X 694
Position Y 426
( M)
3 D drop shadow, as before21.
On the woman tubeImage, Mirror, horizontal
Edit/Copy
* paste as a new layer
Resize if necessary (adapt to your tube)
Adjust, sharpness, sharpen22.
Optional: (adapt to your tube)
Ativar a Makeover tool
Click on Thinify

Position yourself at the center of the tube, Left click 2x
Put as on the example23.
Layers/duplicate
Activate the layer below
Adjust, blur, gaussien , radius at 30
Blend Mode, Multiply24.
On the top
Load the tube (titre)
Selections , select all, float, defloat
Selection, Modify, Contract at 1
Fill in color 2
Select none
Edit/copy
* Paste as a new layer
Effets 3D , drop shadow:
Put how about the final example
Image, Free rotate, 20°, left, other data unchecked
Pick tool, Position:
X 51, Y 345
(M)
25.On the Background layer
Add a new raster layer
Fill in whiteLoad the NarahsMasks_1733
Layers, new mask layers from image: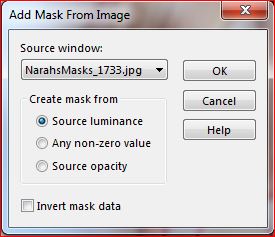
Duplicate
Merge group
Blend Mode, screen, Opacity at 7026.
Duplicate this layer
Image, Mirror, horizontal
Image, Mirror, vertical
Blend Mode Lighten , Opacity at 70
27.Image, Add Borders, symmetric:
2 px color 2
5 px color 1
2 px color 2
25 px white28.
Load the ligne tube, copy
*paste as a new layer29.
Sign and add the author's watermark30.
Add borders, symmetric: 1 px de color 2
Resize, width at 950 px
Adjust, sharpness, unsharp mask, setting: Soft
Save as jpeg
 votre commentaire
 Suivre le flux RSS des articles de cette rubrique
 Suivre le flux RSS des commentaires de cette rubrique
Inédits de ma conscience


