
-
Par ©Moi-Même le 30 Novembre 2020 à 23:47
Merry Christmas


This tutorial is my creation, any resemblance to any other tutorial is pure coincidence.
Prohibited from sharing without my permission.
Autorisations
Tubes, masks, backround, décos ,WA
Plugins :

On Here
Credit for the images used belongs to the author
My tutorials are protected by:

Tubes de:
Personnage: wieskes
Paysage:

Merci les tubeurs!
Autres à réaliser durant le tuto
Unlimited, BKg designer sf10I
Scribe
MuRa’s Meister
Carolaine and sensibility
AAA Frames
Facultatif: Xero
General preparation: Before starting one of my tutorials
This tutorial was created with PSP 2020, can be done with previous versions,
The alpha channel is compatible with pSP7
If you can't open alpha channel: Place the selections in your PSP selections folder
Place the PSP scripts and gradients in the corresponding "regulated" folder.
Most of my filters are in Unlimited, check the filter folder, some work outside of it.
Open the mask on the PSP.
Duplicate the material and work on the copies.
Remove signatures from tubes before use
Double click on presets
 , they will be installed automatically
 You can adapt the colors, the Blend mode of the layers, to your work

Material:

Dimensões iniciais: 900x600 px
Couleurs:

Foreground: cor 1/ #697a8b
Background: cor 2:/ #ffffff
cor 3: #98322e
colocar as cores
1/
carregar o canal alpha_M_C
Preencher com a cor 1
Juntar uma nova layer (layers, new raster layer)
Selections, select all
2/
carregar o tube paisagem (de natal), copy
(Deixe em aberto no PSP para o resto do tutorial)
Sobre o seu trabalho : Paste into selection
Remover a seleção (select none)
3/
Effects, Image effects, seamless tilling: setting: Default
Layers, merge down
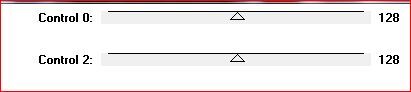
Adjust, Blur, radial blur:

Effects, plugins: Scribe, 4 Way Mirror, como à abertura
Edit, repeat, 4 Way Mirror
4/
Selections, load a selection from alpha channel, sélection 1
Selections, promote selection to layer
Remover a seleção
5/
Effects, Geommetric effects, Circle , transparent marcado
Effects 3 D, drop shadow : 0/0/80/40 cor 3 (ou 1)
Effects, plugins : Scribe, 4 way mirror, como à abertura
6/
Selections, load a slection from alpha channel, Sélection 2
Delete
Remover a seleção
7/
Duplicar esta layer (layers, duplicate)
Image, mirror, mirror horizontal
Layers, Merge down
8/
Seections, load a selection from alpha channel, Sélection 3
Juntar uma nova layer
Copy/paste a paisagem into selection
Remover a seleção
9/
Selections, load a selection from alpha channel, mais uma vez a sélection 2
Promote selection to layer
Remover a seleção
10/
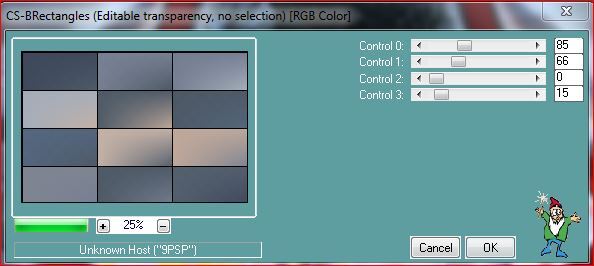
Effects, plugins, Carolaine and sensibility, CS-BRectangles, como à abertura

Colocar à direita, (objects, align, right)
11/
Duplicar esta layer
Image, mirror, mirror horizontal
Merge down
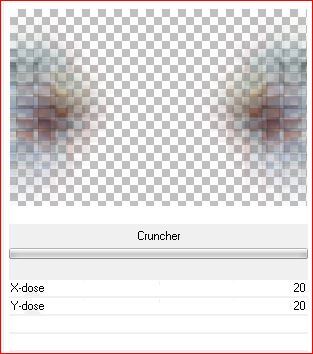
Effects, pluginss : Unlimited, BKg designer sf10I, cruncher, como à abertura
Layers propreties, Blend Mode Overlayt (ou outro, de acordo com suas cores)
12/
Effects, textures effects, Mosaic - antique :

Selections, Load a selection from alpha channel, mais uma vez a Sélection 3
Delete
Manter selecionado
13/
Sobre a layer raster 2
Opcional: Effects, plugins : Xero : Illustrator (1/167/97)

Colocar: Blend Mode, hard light
(ou outro dependendo do seu trabalho, ou diminua a opacidade da camada)
Remover a seleção
Layers, arrange, move down
14/
Sobre a layer acima
Selections, load a selection from alpha channel, Sélection 4
Effects , plugins, Carolaine and sensibility, CS- ldots : (255/3/2)

Remover a seleção
Colocar: Blend Mode, hard light
Effets 3 D drop shadow : 0/0/80/40/ branco
Layers, arrange, bring to top
15/
Carregar a « déco centre », copy/paste as a new layer
16/
Sobre a layer raster 1
Duplicar esta layer
Effects, plugins :
Carolaine and sensibility CS-BRectangles : (85/66/0/15)
MuRa’s Meister, perspective tilling :

17/
Activar magic wand tool, Feather a 44
Clica sobre a parte superior da layer (a transparencia)
Delete 3x
Remover a seleção
Colocar: Blend Mode , hard light (lumière dure em françês)
print das layers actuais :

18/
Image, add borders, symmetric marcado:
2 px cor 2
2 px cor 1
2 px cor 3
19/
Selections, Select all
Image, add borders : 100 px de branco
Selections, Invert
Effects, plugins : Unlimited, Bkg designer sf10I, Cruncher, como à abertura
Selections, invert
Effects 3D drop shadow : 0/0/80/40 preto
Remover a seleção
20/
Com a magic wand tool, tolerance / progressivity a 0, selecionat o rebordo branco
Selections, invert
Effects , Image effects, seamless tilling: Default
Selections, Invert
Adjust, blur, radial como antes
Textures Effects, Mosaic antique como antes
Selections, Invert
Effects 3 D, drop shadow como antes
Remover a seleção
21/
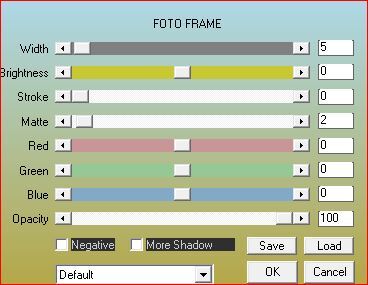
Effects, plugins : AAA Frames, Foto frame :
22/
Carregar, copy/paste as a new layer a « Déco latérale »
Colocar: Blend Mode, screen
23/
Carregar, copy/paste as a new layer a déco « Guirlande »
colocar no cimo à esquerda : (Objects align top e align left)
24/
Carregar, copy/paste as a new layer a « Déco boules de noël »
Colocar direita como sobre o exemplo final
25/
Carregar, copy/paste as a new layer a « déco Neige »
Colocar em baixo como sobre o exemplo final ou (objects, align, bottom)
26/
Carregar, copy/paste as a new layer o titulo :« Wa_titre »
Colocar como sobre o exemplo
27/
Carregar, copy/paste as a new layer o tube personagem (père noël pour moi)
Resize a 90% all layers demarcado
Colocar como sobre o exemplo
Effets 3 D drop shadow , como antes
28/
Duplicar esta layer
Sobre a layer abaixo
Adjust, blur, radial, como antes (ainda memorizado)
Blend Mode, Multiply
29/
Assinar e juntar a minha assinatura
Layers, Merge all
30/
Image, resize width a 950 px de
Salve

A minha versão 2 :(blend mode das layers adaptados), misted desconhecido,Tube de Azalée, Obrigado !

Merci Alyciane pour avoir testé ce tuto

Merci Béa pour avoir testé ce tuto

 4 commentaires
 Suivre le flux RSS des articles de cette rubrique Suivre le flux RSS des commentaires de cette rubrique
Inédits de ma conscience
-
O crédito das imagens utilizadas
pertence ao devido Autor
Os meus tutoriais e traduções são protegidos por:
Interditos de qualquer difusão sem a minha autorização
Agradeço o respeito por o meu trabalho.

-


