-
Par ©Moi-Même le 1 Février 2021 à 21:13
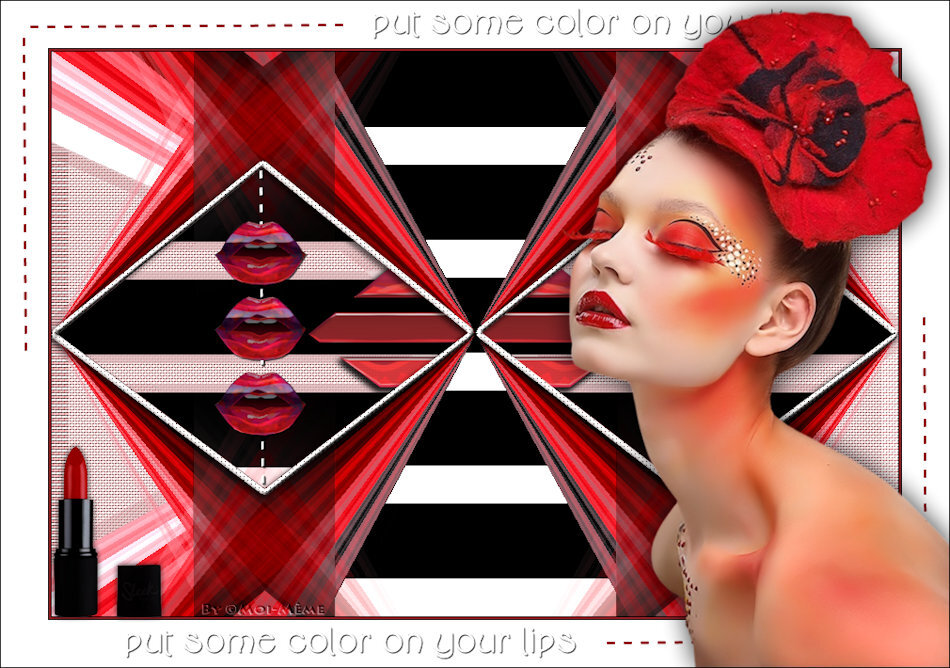
Lips
put some color on your lips...

This tutorial is my creation, any resemblance to any other tutorial is pure coincidence.
Prohibited from sharing without my permission.
Autorisations
Tubes, masks, backround, décos ,WA
Plugins :

On Here
Credit for the images used belongs to the author
My tutorials are protected by:

Main tube by: Karine Dreams
Thank you!
WA et décos, misted : by Moi-Même
others to do during the tutorial
Unlimited:
Bkg Designer sf 10I, cruncher
______________
Divers, penzilla
Transparency, eliminate whit
General preparation: Before starting one of my tutorials
This tutorial was created with PSP 2020, can be done with previous versions,
The alpha channel is compatible with pSP7
If you can't open alpha channel: Place the selections in your PSP selections folder
Place the PSP scripts and gradients in the corresponding "regulated" folder.
Most of my filters are in Unlimited, check the filter folder, some work outside of it.
Open the mask on the PSP.
Duplicate the material and work on the copies.
Remove signatures from tubes before use
Double click on presets
 , they will be installed automatically
 You can adapt the colors, the Blend mode of the layers, to your work

Material:
Initial dimensions 900x600 px
Colors:

Foreground, color 1: #f14a4d
Background, Color 2: #901e25
3/ White
4/ black
1/
Load the canal alpha Lips
fill with color 2
Effects, plugins:
Divers, penzilla, how to opening:

2/
Layers, Duplicate
Image free rotate 90°, left , other data unshecked
Effects Image effects, seamless tilling:

Edit, Repeat seamless tilling
3/
On the layer raster 1
Selections, select all
Image, crop to selection
4/
On the layer above
Effects, plugins: Transparency, eliminate white
Selections, load a selection, from alpha channel, sélection 1
DELETE
Selectins, select none
5/
layers, duplicate
Effects, Image effects, seamless tilling, Default
Layers, merge down
Selections, load a selection, from alpha channel, sélection 1
DELETE
Keep selected
6/
Add a new raster layer
Selections, modify, select selection borders:

Fill with color 3
Effects, Textures, weave, colors 1 and black:

Effects, 3 D, Inner bevel:

Select none
Effects 3D, drop shadow: 3/ - 3/ 80/9/black
7/
On the layer raster 1
Load the "motif_calque.png ", Copy
On your work: paste as a new layer
Layers, Merge down
8/
Selections, load a selection, from alpha channel, Sélection 2
Selections, promote selection to layer
Effects Textures, weave: previous colors, with this data:

Effects, plugins: Unlimited, Bkg Designer, sf10I, Cruncher, at 10/10

(it will change the tone of your color is normal)
Select none
9/
On the layer above
Load/copy/paste a new layer the déco 02_MM
(You can color or use the changer colors tool, just a few clicks)
Copy/paste as a new layer
Image, resize at 40 %, all layers unshecked
Effects 3 D drop shadow, as before
screenshot layers:

10/
Image add borders, symmetric:
1 px black
2 px color 2
1 px black
50 px white
11/
Load/ Copy/paste as a new layer the déco 1
Place with pick tool K: (press K on your keyboard to activate it)
Position: X 227 , Y 180
(M key to deselect the tool)
12/
Load/ copy/paste as a new layer a the "déco coins fin"
Do not shift
13/
Load/ copy/paste as a new layer, the "rouge lèvres_MM 1" tube
Image, resize a 50 % tall layers unshecked
Effects 3 D drop shadow : 0/0/80/9 black
Place with pick tool K :
Position: X 49 , Y 467
(or as you wish)
14/
Copy/paste as a new layer the " WA Texte"
Do not shift
15/
Copy/paste as a new layer the woman tube
Image, resize a 60%, all layers unshecked
Place with pick tool K:
position: X 594 , Y 9
(adapt to your tube)
Effects 3D drop shadow : 1/1/80/40 black
16/
Sign, attach my signature
17/
Add borders de 1 px black
18/
Resize width at 950 px
Save as JPG/jepg
Ma version 2: Tube de Cibibijoux, merci !


Merci !!

 votre commentaire
 Suivre le flux RSS des articles de cette rubrique
 Suivre le flux RSS des commentaires de cette rubrique
Inédits de ma conscience


