-
Romatique Steampunk (Eng)
Romantique Steampunk
This tutorial is by Béa
Thank you Béa, for allowing me to translate your tutorial
This tutorial is protected by copyright
The material provided is protected by the authors of the tubes
It is prohibited to appropriate or modify the original and / or signatures.
Any dissemination without written authorization is prohibited.
Tutorial Original: On Here
Material: On Here
You will need a steampunk-style tube character
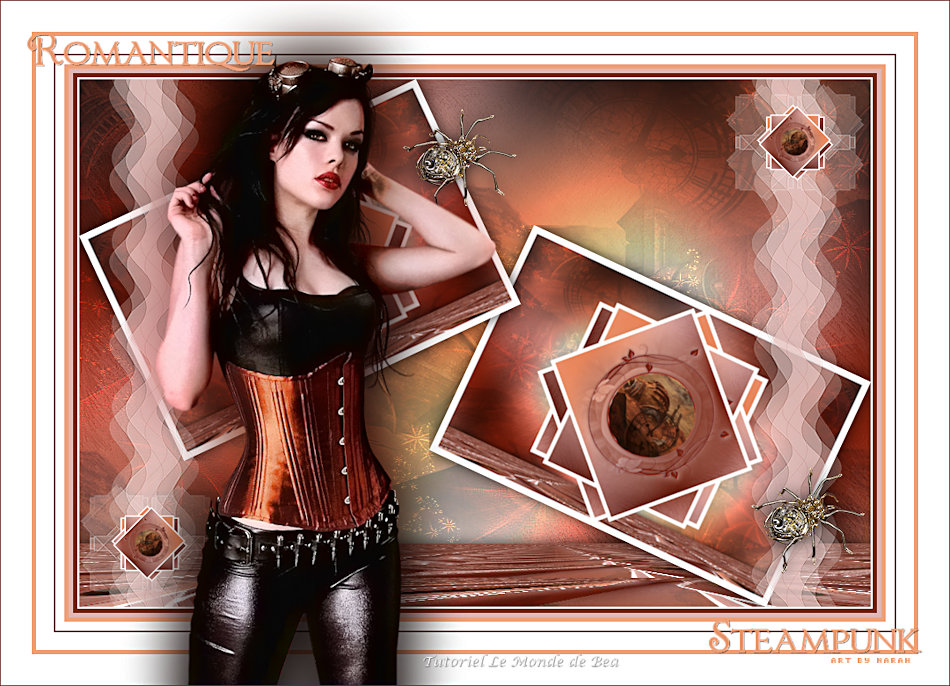
My version, slightly different colors:
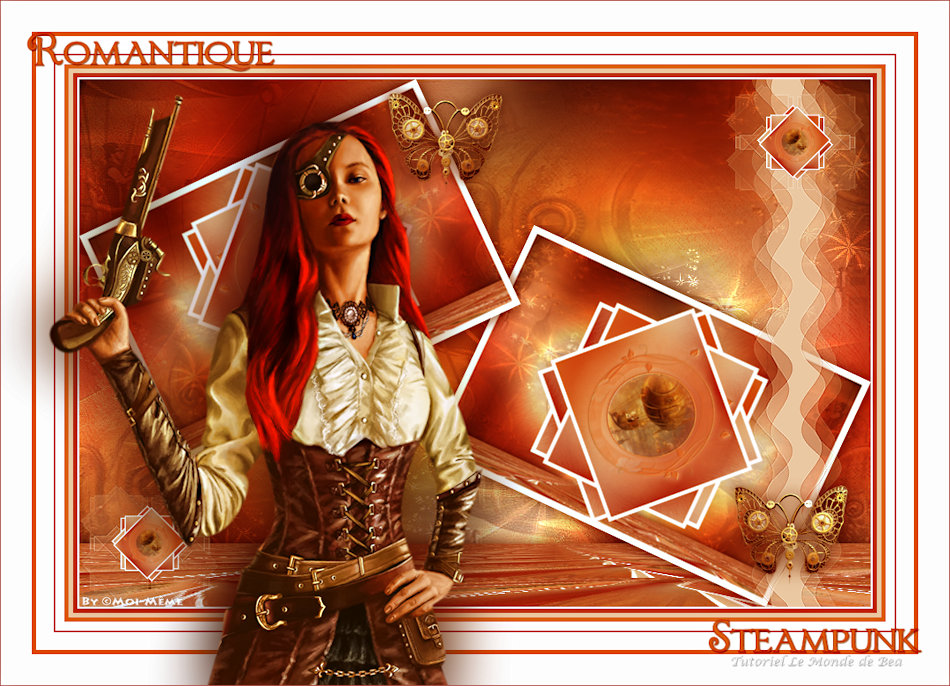
Plugins:
Mehdi - Mura's Meister - Mura's Seamless -
Unlimited - Graphic Plus - Richard Rosenman

1.

Color 3/ foreground
Color 2/ background
2.
Load the file Alpha_RomantiqueSteampunk
Window/Duplicate, close the original, work on the copy
3.
Effects , plugins: Mehdi - Wavy lab 1.1 - Color 1 in the 3rd and 4th place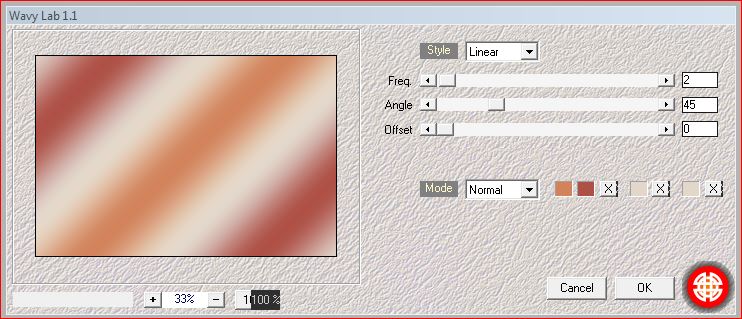
4.
Effects, textures, Fur...

Adjust, sharpness, sharpen more
Layers/duplicateImage, Mirror, mirror horizontal
Layers, propreties, opacity at 50 , blend mode, Multiply
Layers, merge down
5.
Layers, new raster layerFill with Color 3
Load the mask: sdtMask151
Layers, New mask layer, from image : invert checked

Layer, merge group
Edit/cut
6.
With the selection tool "S" , custom selection:
Edit/paste into selection
Select noneEffects 3D , drop shadow: 0/0/75/ 25 , white
7.
Selections , Load a selection from alpha channel, load sélection 1
Layers, new raster layer
load the tube paisagem steampunk
remove the watermark, copy
On your work: paste into selection
Image, Resize at 115% all layers unshecked (adapt to your landscape)
8.
With the move tool ( M ), adapt the landscape position within the selection
Selections/Invert
DELETE
Select none
9.
On the layer below (mask)Adjust, sharpness, sharpen more
Effects, edge effects, enhance
Effects , plugins: Mura's Seamless, Emboss at alpha , how to opening10.
On the layer aboveAdjust, sharpness, sharpen
Layers, merge down
Adjust, sharpness, sharpen
11.
On the layer Raster 1Selection tool (S), custom selection as before

Selections, promote selection to layer
Effects , plugins: Richard Rosenman - Solid border

Select none
12.
On the layer aboveMerge down
To get the same result:
I had to use the move tool M and place it at the center of my work
objects, align, centrer in canvas, to center
(according to the original:
" Objects - Align - Center in canvasOr pick tool "K" - Position X 224 - Position Y 98
M key to deselect")
Effects , plugins: Mura's Meister , Copies, original print :

13.
On the raster 1 layer
Add a new raster layer
Select all
Copy the landscape again
Paste into selection
Select none
Blend Mode, Multiply, Opacity at 50
Adjust, sharpness, sharpen
Effects, Image effects, seamless tilling, setting: Default
14.
Edit/Copy special, copy mergedEdit/ paste as a new layer
Effects , plugins: Mura's Meister, Perspective Tiling
original print:

Edit/ repeat Perspective Tiling
Effects 3D drop shadow 0 / 0 / 75 / 25 black
15.
On the Raster 1 layerEffects, plugins: Graphic Plus - Cross Shadow, how to opening
On the layer above
Add a new raster layer
Fill with color 3
Carregar o mask : Silvie_mask_Flowers69...
Layers, new mask layer, from image:
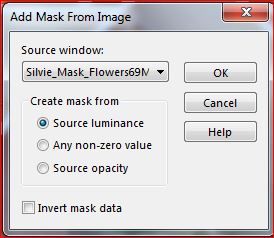
Image, Mirror, horizontal
Layers, Duplicate
Merge group
16.
Blend Mode , dodge, Opacity at 40Edge effects, enhance more
Sharpness, sharpen more
17.
Window/ Duplicateon copy: layers, merge visibles
Image Resize a à 65% all layers unshecked
Selections, Select all, float, defloat
Effects, plugins: Richard Rosenman, Solid border, as before
Select none
18.
Edit/Copy
About the initial work:
Activate the layer from the top of layers
Edit/Paste as a new layer
Resize, 2 times, at 85% all layers checked
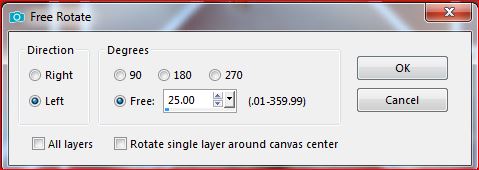
Image , Free rotate:
Objects , Align, Top
Objects , Align, left
Effects 3D drop shadow as before
19.
Layers/ Duplicate
Image, Mirror, Horizontal
Objects, Align, bottom
Layers, arrange move down
20.
Layers, new raster layerSelections , load a selection from alpha channel, load sélection 2
fill with color 1
Select none
Duplicate
! put Color 1 in background!
Effects, plugins, Unlimited - &<Bkg Designer sf10 I> Cruncher 10 - 10
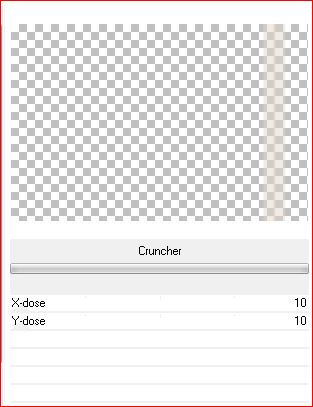
Merge down
Duplicate
Image, Mirror, horizontal
Merge downEffects, Distortion effects, wave

21.
! Color 1 in background !
Effects, plugin: Unlimited - &<Bkg Designer sf10 I> Cruncher, novos dados 0 - 20
Distortion effects,wave, as beforeImage, Resize a 105% all layers unshecked
Adjust, Sharpness, sharpen, 2 times
22.
On the center frame layer (Promoted Selection)Resize a 15% tall layers unshecked
Layers, arrange, bring to top
activate the pick tool ( K key) , place it:
Position X 770
Position Y 28
M key to deselect
23.
Duplicateactivate the pick tool (tecla K) , place it:
Position X 36
Position Y 484
M Key
merge down
24.
Duplicate
Effects , plugins: Unlimited - &<Bkg Designer sf10 I> Cruncher, novos dados: how to opening (20/20)
Move down
Adjust, sharpness, sharpen, 2 times
25.
Load the tube " papillon steampunk"
Remove the watermark
Resize a 22% all layers unshecked
Edit/Copy
On the top layer
Edit/paste as a new layer
Put as in the example or according to your wish
Effects 3D , drop shadow as before
Duplicate and Put as in the example or according to your wish26.
Image, Add borders, symmetric:
2 px White
5 px Color 3
5 px Color 1
5 px Color 2
10 px White
2 px Color 3
20 px White
5 px Color 2
35 px White27.
Load the tube titre, copy
On your work: paste as a new layer
Modify Color as needed28.
Load your tube steampunk characterEdit/copy
Paste as a new layer
Image, Resize: as necessary
Put as in the example or according to your wish
29.
DuplicateOn the layer below
Adjust, Blur, gaussien , radius at 35
Blend Mode, Multiply
30.
Sign and add the author's watermark31.
Image, Add borders : 1 px de Color 3
Resize width a 950 px, all layers checked
Adjust, sharpen, Unsharp mask, setting softSave as jpeg
Thank you Narah
-
Commentaires
Inédits de ma conscience


