-
Belle comme un diamant (eng)
Belle comme un diamant
Beautiful like a diamond
This tutorial is by Béa
Thank you Béa, for allowing me to translate your tutorial
This tutorial is protected by copyright
The material provided is protected by the authors of the tubes
It is prohibited to appropriate or modify the original and / or signatures.
Any dissemination without written authorization is prohibited.
Tutorial translated with PSP 2019
Original tutorial: On here
Version conforming to the original: tubes by Béa
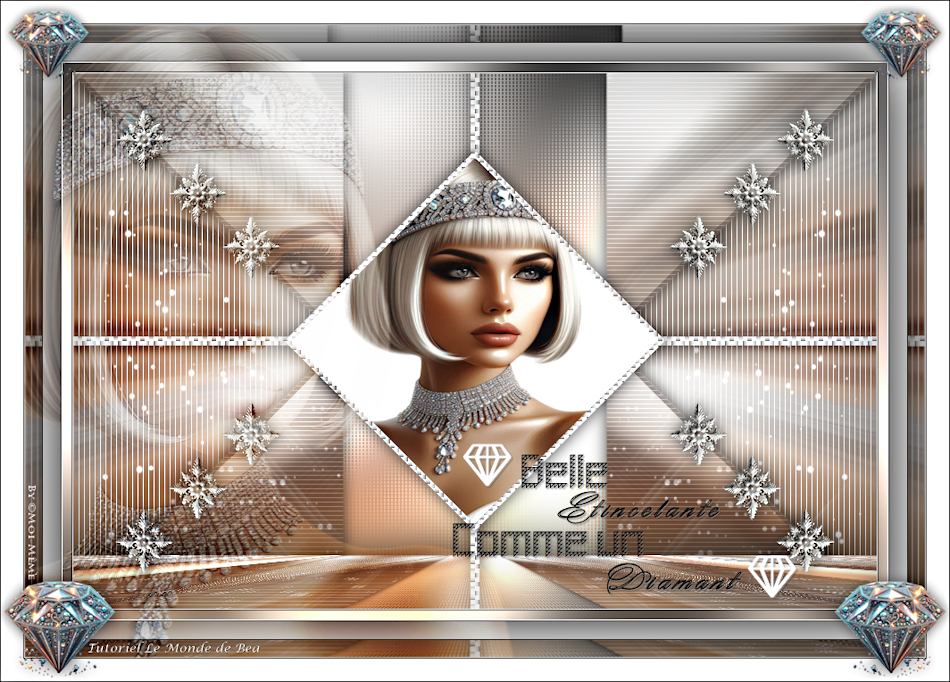
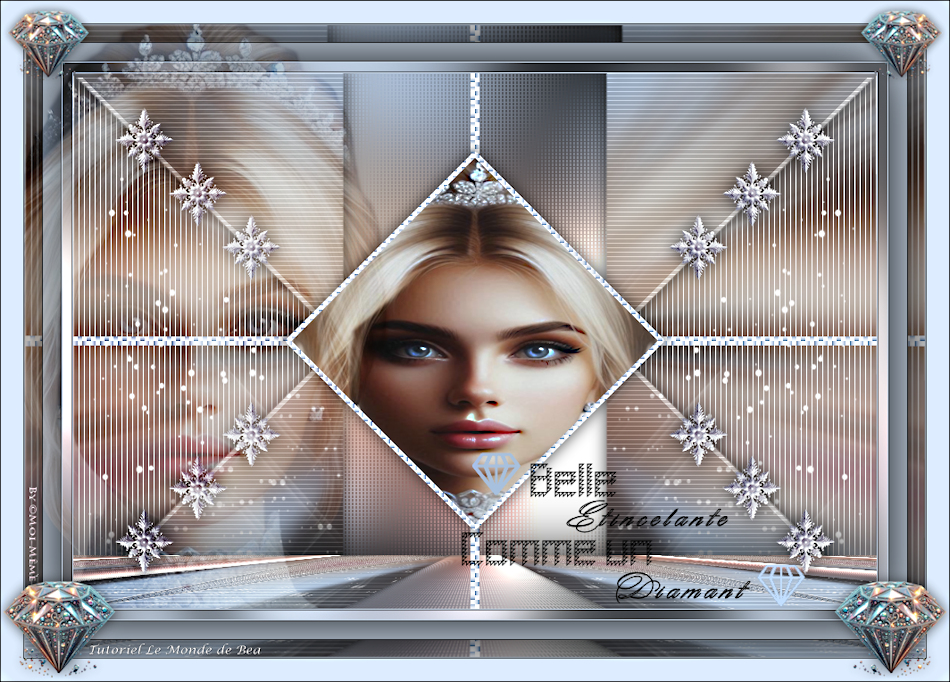
My version: AIgenerated & tube by Moi-Même
I chose light blue instead of white to fill the alpha channel and borders
Material: On here
Remove watermarks from tubes before using them
Colors:
White
Personally: I put light blue in Foreground and background
1.
Load the file Alpha_BelleCommeUnDiamant
Window/duplicate, close the original, continue on the copy
2.
Fill with white color
Layers, new raster layer
Selections , Select all
Load the woman tube
Edit/ Copy
*On your work: Edit/paste into selection
Selections, select none
3.
Effects, Image effects, seamless tiling, setting: side by side
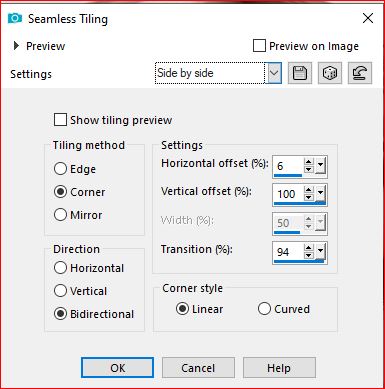
Layers, merge down
Adjust, blur, radial:
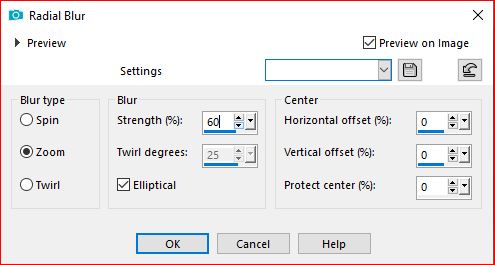
4.
New raster layer
Fill with white color
Load the mask (in the mask folder)
*On your work: Layers, new mask layer, from image:
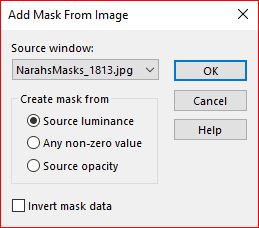
5.
Duplicate
Layers, merge group
Layers, properties, Blend Mode, Lighten
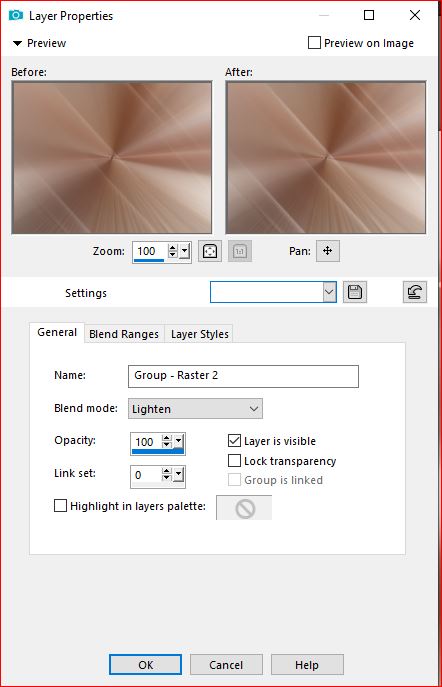
Layers, merge down
6.
Selections, load a selection from alpha channel, sélection 1Selections, promote selection to layer
Effects, plugins: Carolaine and Sensibility - cs-texture, how to opening
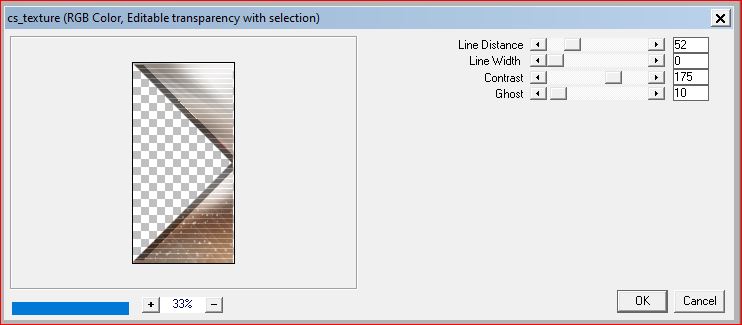
Effects 3D , drop shadow 0 / 0 / 75 / 25 , black
Selections , select none
7.
Activate the Raster 1 layer
Selections, load a selection from alpha channel, sélection 2
Selections, Promote selection to layer
Effects, plugins: Ap lines Silverlining, lines options: vertical:
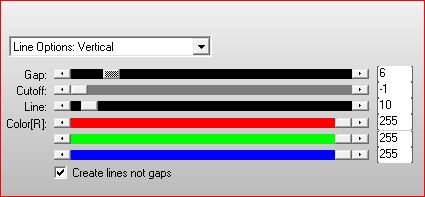
Select none
8.
Activate the layer at the top of the layers
Merge down
Duplicate
Image, Mirror, mirror horizontal
9.
Activate the Raster 1 layer
Adjust, blur, gaussien, Radius at 30
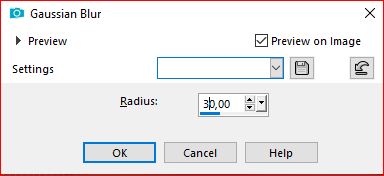
Effects, plugins:
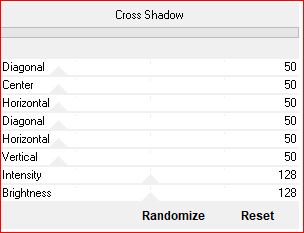
Graphic Plus, Cross shadow , how to opening
L&K , katharina, how to opening
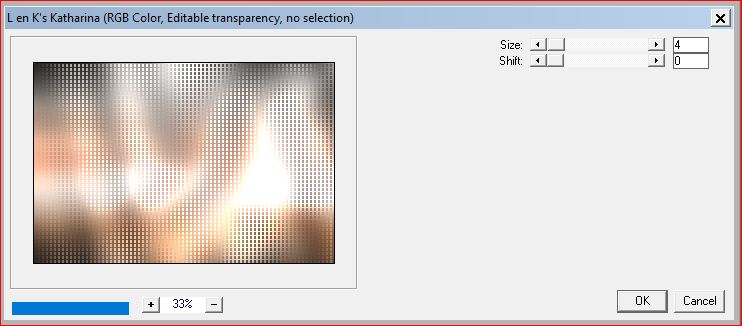
10.
Activate the layer at the top of the layers
New raster layer
Effects, plugins: Unplugged X - Vanderlee: 45°Rectangle, with the following data, white color:
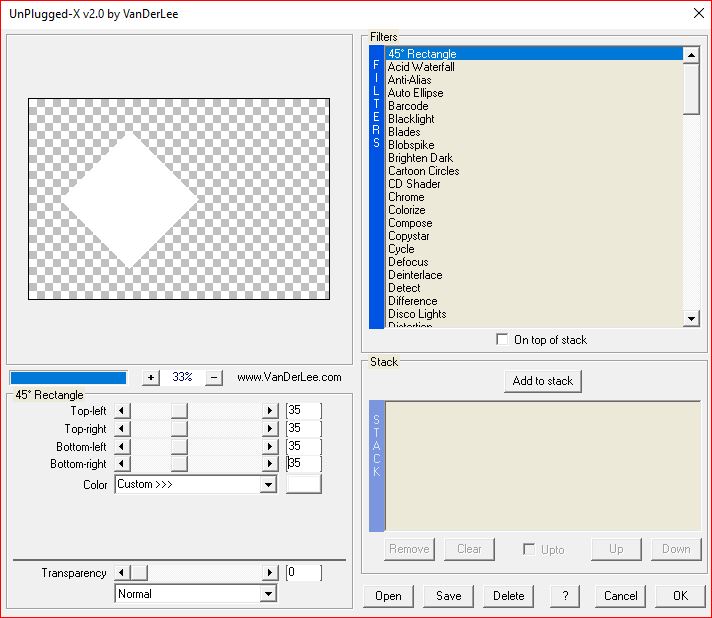
Objects , Align, Center in canvas
Or
Pick tool (K key) , place it :

Position X 241
Position Y 91
(M key to deselect)
11.
Selections, load a selection from alpha channel, sélection 3
Copy the woman tube once again
*Paste into selection
Selections, Modify, Select the selection borders:
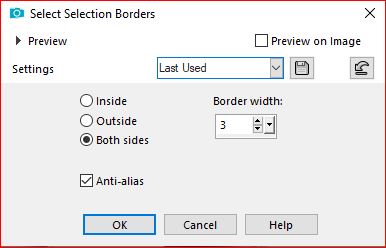
12.
New raster layer
Fill in white color
Effects, textures, weave: black
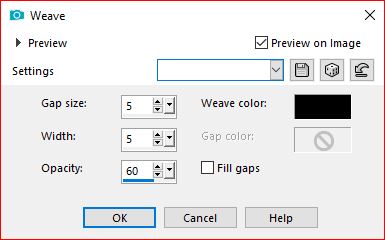
Select none
13.
Layers, Merge down
Effects 3D , drop shadow, as before (memorized)
14.
On the layer below
Load the tube Deco_lignes, copy
*Paste as a new layer
Effects, textures, weave, as before (memorized)
Effects 3D , drop shadow, as before (memorized)
15.
Activate the layer at the top of the layers
Load Deco_1, copy
*Paste as a new layer
Pick tool (k), place it:
Position X 46
Position Y 38
(M)
Effects 3D, drop shadow, as before
16.
Current Layers:
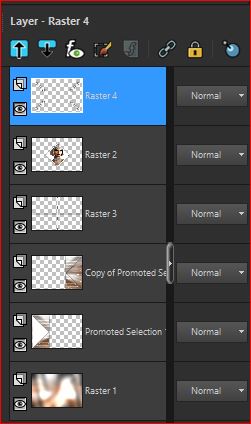
17.
Close the eye of the 3 upper layers

On the raster 1 layer
Layers, merge visibles
18.
Duplicate
Effects, plugins: Mura's Meister - Perspective tiling:
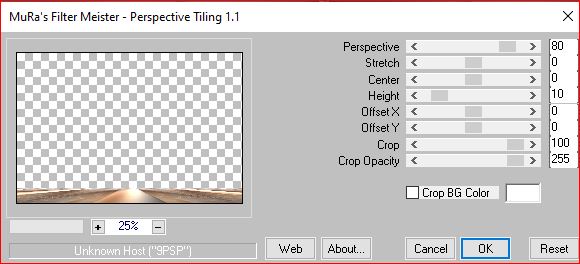
Effects 3D , drop shadow: 0 / 0 / 100 / 100, black
19.
Layers, view, all
Image, Add borders, symmetric:
1 px white
Edit/ Copy
(Paste as a new image, For precaution)
20.
Image, Add borders, symmetric:
1 px black
Selections, Select all
Image, Add borders, symmetric:
10 px white
Selections, Invert
Edit/paste into selection, (memorized image)
Adjust, blur, Flou gaussien, as before
Effects, plugins: Graphic plus , Cross Shadow , how to opening
Effects 3D , drop shadow, as before (memorized)
Select none
21.
Image, Add borders, symmetric:
1 px white
1 px black
Selections, Select all
22.
Image, Add borders, symmetric:
20 px white
Effets 3D, drop shadow, as before
Select none
23.
Image, Add borders, symmetric:
1 px black
Select all
Image, Add borders, symmetric:
20 px white
Selections, Invert
Edit/paste into selection (Memorized image)
Selections, Invert
Effets 3D, drop shadow, as before
Select none
24.
load the file word art.pspimage
Place yourself on the diamonds (if you want them in white):
Raster 3 and copy of raster 3: Image, negative image
Edit/copy special, copy merged
*Paste as a new layer
Pick tool (K), place it:
Position X 480
Position Y 470
(M)
25.
Effets 3D, drop shadow, 1 / 1 / 50 / 1, white
Effets 3D, drop shadow, 1 / 1/ 50 / 1, black
26.
Copy the woman tube again
*Paste as a new layer
Image, Resize a 85%, all layers unchecked
Layers, properties, Blend mode, soft light
Place it on the left, see the final example
27.
Image, Add borders, symmetric:
1 px black
25 px white
28.
Carregar Deco_coins, copy
*paste as a new layer
29.
Sign and add the author's watermark
30.
Image, Add borders, symmetric:
1 px black
Image/Resize, width at 950 px
Adjust, sharpness, unsharp mask, setting: soft
Save as jpeg
-
Commentaires
Inédits de ma conscience


