-
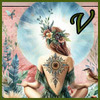
Colybrix (eng)
Colybrix
This tutorial is by Béa

Thank you Béa, for allowing me to translate your tutorial
This tutorial is protected by copyright
The material provided is protected by the authors of the tubes
It is prohibited to appropriate or modify the original and / or signatures.
Any dissemination without written authorization is prohibited.
Tutorial translated with PSP 2019
This tutorial is a dedication to our friend Colybrix
Tutorial original on HERE

A minha versão, tubes AIgen pessoais:

Material on HERE
Nota: Duplicar o material e trabalhar sobre as copias
Plugins:
Mehdi
L en K's
Graphic Plus
Alien skin eye Candy 5 Textures
Mura's Meister
Guide:
1.
Colors:

Place the colors:
Foreground, color 1 #829d14
Background, color 2 (white)
2.
Load the Alpha_Colybrix file
3.
Effects , plugins: Mehdi , Wavy lab 1.1 - Color 1 in 3, white in 4

4.
Effects , plugins: L en K's, Katharina, as to the opening

Image, Mirror, horizontal
Repetir o plugin L en K's, Katharina, as to the opening
Adjust, sharpness, sharpen
5.
Selections, load a selection from alpha channel, sélection 1

Promote selection to layer
Adjust, blur, gaussien radius at 15
Effects , plugins: Graphic Plus , Cross Shadow , as to the opening

6.
Layers, new raster layer
keep selected
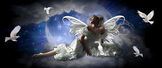
Lad the woman tube
(Remove signature from tubes before using them)
Edit/copy
*On your work: Edit/paste into selection
7.
Layers, new raster layer
Selections, Modify, Select the selection borders:

Fill in color 1
Effects , Textures effects, weave:

Adjust, sharpness, sharpen
Effects 3D, drop shadow 0 / 0 / 75 / 25 black
Selections, select none
Again: Effects 3D, drop shadow 0 / 0 / 75 / 25 black
8.
Activate the layer below (woman)
Layers, Duplicate
On the layer below (the original)
Adjust, blur, gaussien, as memorized
Layers, properties, Blend Mode Multiply
9.
Layers:

10.
In the materials palette, Close the eye of raster 1
Edit/Copie special, Copy merged
Edit/paste as a new image
Export in png for security
11.
* Activate and reopen the eye of raster 1
Layers, new raster layer
Fill in white
Load the mask ildiko_maszk_2016_25
*On your work, Layers, new mask layer from image:

Duplicate
Layers, Merge group
Blend Mode, lighten

12.
Activate the top layer of the layers
Layers, new raster layer
Selections, load a selection from alpha channel, selections 2
Fill in color 1
Effects , plugins: Alien skin Eye Candy 5 : Textures - Texture Noise

Effects 3D, drop shadow 0 / 0 / 60 / 30 black
Keep selected
13.
Layers, new raster layer
Selections, Modify, Select the selection borders

Fill in color 1
Effects , edge effects, enhance
Effects 3 D, drop shadow, as before/memorized
Selections, select none
14.
Layers, merge down
15.
On the image you left aside
Resize at 25% , all layers unshecked
Edit/Copy
* Paste as a new layer
Effects, image effects, offset

Effects , plugins: Mura's Meister - Copies

Merge down
16.
Layers, Duplicate
Image, Mirror, horizontal
17.
Edit/ Copy special, Copy merged
18.
On the Raster 1 layer
Edit/ paste as a new layer
Effects, distotion effects, Pixelate

Effects , plugins: Mura's Meister - Perspective tiling

Effects 3D, drop shadow, as memorized
Edit/repeat drop shadow
19.
Copy the tube woman again
* Paste as a new layer
Layers, properties, Opacity at 25
20.
Activate the top layer of layers
Load Deco
Colorize according to your colors
Effects , plugins: Alien skin eye candy 5 Impact - Glass - Clear

Edit/ Copy
* Paste as a new layer
Activate the pick tool"tecla K" , place it:
Position X 185
Position Y 10
(M key to deselect)
Effects 3D , drop shadow 0 / 0 / 60 / 20 black
21.
We are at the top of the layers
(*Personal note: to get the same result I did not load selection 1 as requested in the original)
Load Deco_glass, copy
* Layers, new raster layer (for me, it was not necessary)
Paste into selection (for me, paste as a new layer)
Remover a seleção (if that is your case)
Effects 3D , drop shadow, as before
22.
Layers, merge visibles
23.
Layers, new raster layer
Selections, select all
Effects 3D , cutout, black

Select none
24.
Image, Add bordes symmetric:
1 px black
10 px white
3 px color 1
10 px white
3 px color 1
Select all
25.
Image, Add bordes symmetric:
15 px de white
Effects, image effects, seamless tilling: setting Default

Selections, Invert
Adjust, blur, gaussien, radius at 15
Effects , plugins: Graphic Plus, Cross Shadow , as to the opening
Effects , plugins: L en K's , Katharina , as to the opening
Adjust, sharpness, sharpen
26.
Selections, invert
Effects 3D drop shadow, as before
Select none
27.
Image, Add bordes symmetric:
1 px color 1
30 px white
28.
Carregar Colibri_Lemondedebea (pássaro), copy
*paste as a new layer
Image, Resize at 20 % , all layers unshecked
(adapt to the dimensions of your tube)
Place it in the bottom left corner, see final example
29.
Load title (titre)
About the same: selections , select all, float, defloat
Fill in color 1 (your color 1)
Selections, Modify, Contract at 2
Fill in white
Selections, remover a seleção
30.
Edit/copy
*Paste as a new layer
Ativar a Pick tool "K", place it:
Position X 414
Position Y 96
(M)
31.
On the layer below (bird)
Duplicate
Resize a 35%, all layers unshecked
Place to the right of the title, see example
or (K) Position X 628 Position Y 87
32.
Duplicate
Image, Mirror, horizontal
33.
On top of the layers:
Lyers, merge down, two times
34.
Adjust, sharpness, sharpen more
Effects 3D drop shadow 1 / 1 / 50 / 1 color 1
Repeat the drop shadow changing it to white color
35.
On the layer below (bird)
Effects 3D , drop shadow 0 / 0 / 60 / 20 black
36.
Sign and add the author's watermark
37.
Image, Add borders, symmetric: de 1 px color 1
Image, Resize width at 950 px
Adjust, sharpness, unsharp mask, setting: soft
Save as jpeg

-
Commentaires
Inédits de ma conscience
-
O crédito das imagens utilizadas
pertence ao devido Autor
Os meus tutoriais e traduções são protegidos por:

Interditos de qualquer difusão sem a minha autorização
Agradeço o respeito por o meu trabalho.

-


Le monde de Béa


La passion de Mel

Le Jardin de Félinec31

Traduções Alyciane e Garances


Click sobre o nome
Cloclo
Barbara de Venise


En Français pour Anja Timmers


En Français pour SimPsp


-
Tubes divers:


-

-