-
Eugénia Clo (Eng)
Eugénia Clo
This tutorial is by Béa
Thank you Béa, for allowing me to translate your tutorial
This tutorial is protected by copyright
The material provided is protected by the authors of the tubes
It is prohibited to appropriate or modify the original and / or signatures.
Any dissemination without written authorization is prohibited.
Original Tutorial: On Here
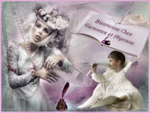
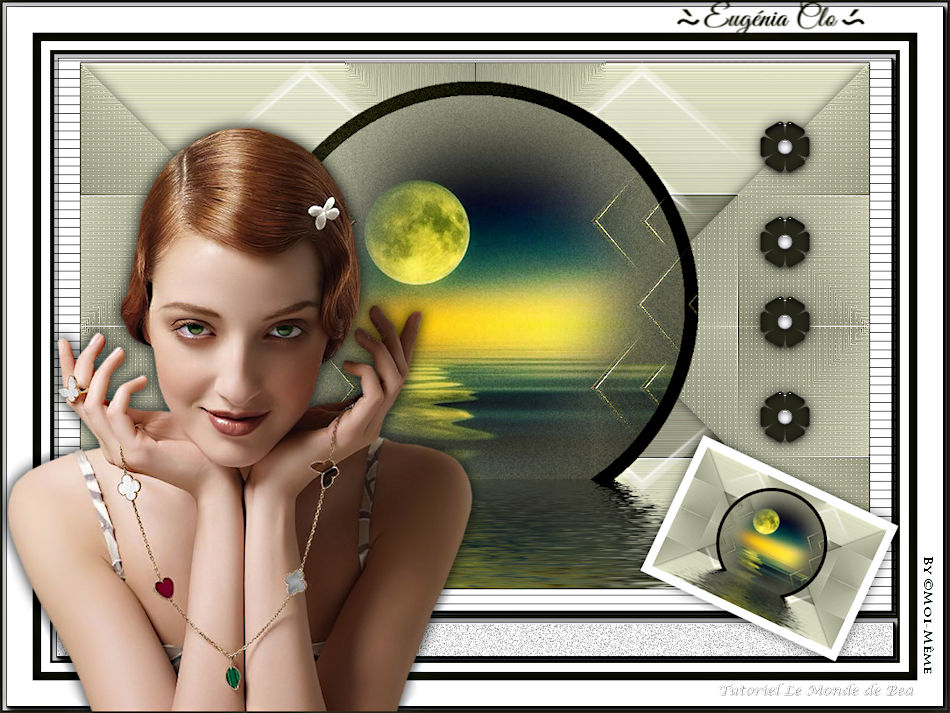
Version conforms to the original:

My version, tube and misted by Eugénia Clo, Thanks:
Material On Here
Start:
1.
Original Colors:

Foreground: Color 1 #e9b9cd
Background: Color 2 #531931
In Background: choose a dark color in your main tubeIn Foreground: on the same color, move the cursor up to get a lighter color

2.
Load the file Alpha_EugeniaClo
Window/ Duplicate
Close the original - Let's work on the copy3.
Fill with this linear gradient: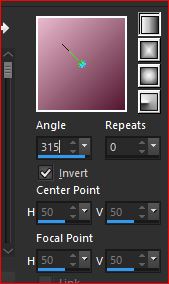
4.
Adjust, add/remove noise, add noise:
5.
Layers, new raster layer
Fill with dark colorLoad the mask NarahsMasks_1716
Layers, new mask layer from image:

Layers Merge group
Effects, Edge effects, enhance more
Effects, User defined filters: emboss 3
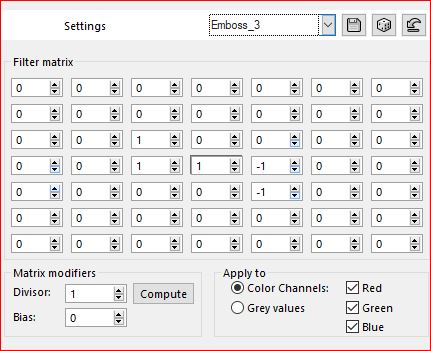
6.
Image, free rotate: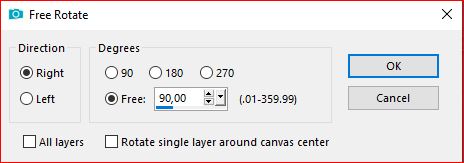
Objects , Align , Right
Ou com a pick tool "K" :
Position X 300
Position Y -150
( M to uncheck)7.
Effects, Unlimited - &<Bkg Designer sf10 IV> @Instant tile , how to opening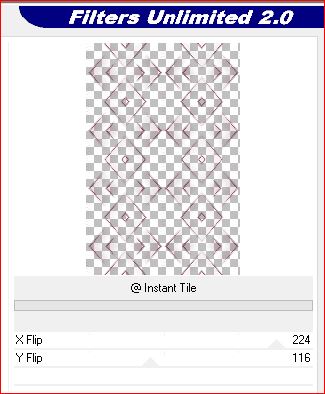
layers, duplicate
Image, Mirror, mirror horizontal
Layers, merge down8.
Selections , load a selection from alpha channel, sélection 1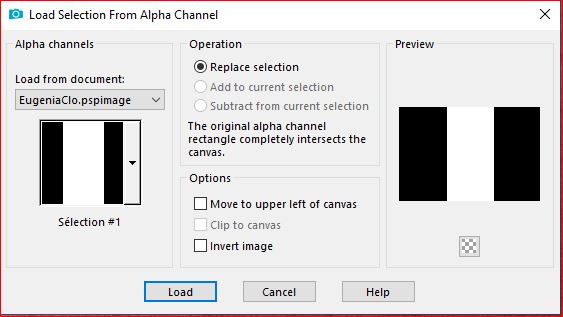
DELETE
Selections, select none
Effects 3D drop shadow 0 / 0 / 60 / 20 black9.
Effects plugins:Graphic Plus - Cross Shadow, how to opening
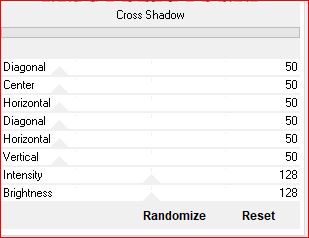
FM Tile Tools - Blend emboss, how to opening

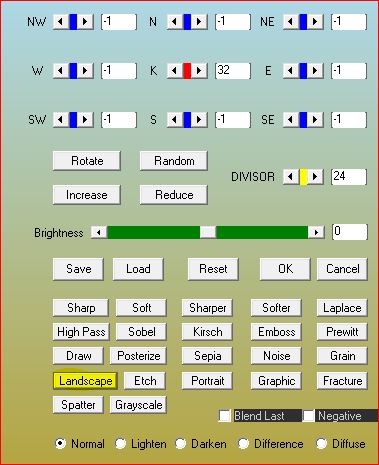
AAA Filters - Custom - click 1 time on landscape/ok
10.
On the Raster 1 layer
load the landscape
(remove signature if necessary)
Edit/ Copy
on your work: paste as a new layer
Image, resize at 85% , all layers uncheckedEdit/repeat resize
(adapt according to your misted)
Layers, properties, Blend Mode, hard light11.
On the Raster 1
Selections - Select all
Image , cropt to selection
Layers, Duplicatestay on copy of raster 1 layer
Close raster 1 visibility (click on the eye)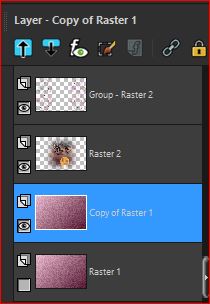
Layers, merge visible
12.
Reopen Raster 1's eye
We are on the top layer of the stack
Effets, plugins: Unlimited - Buttons & Frames - Round Button
Resize a 85% all layers unchecked
Effets, Image effects - offset
13.
Effects, plugins: Flaming Pear - Flood

14.On the Raster 1 layer
Effects, plugins: Mehdi - Sorting tiles
Effects, Edge effects, enhance more15.
Effects, plugins: Simple - Top left mirror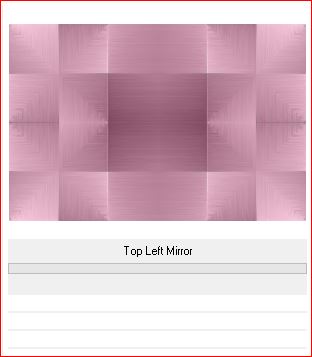
Simple - Pizza Slice Mirror
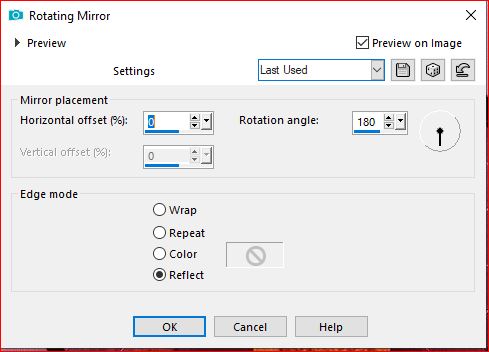
Effects , reflection effects, rotating mirror
16.
Selections, load a selection from alpha channel, sélection 2
promote sélection to layer
Effects, plugins: Carolaine and Sensibility - Cs-LDots
Effects 3D drop shadow, as before
Select none17.
Layers, duplicate
Image, Mirror, mirror horizontal
Layers, merge down18.
On the Raster 1 layer
Carregar o tube Deco, copy
Paste as a new layer
Activar a Pick tool "K" , place it:
Position X 67
Position Y -10
M key to uncheck
Blend Mode, screen, Opacity at 7519.
Window - Duplicate (leave the copy aside)
On the initial work: Image, Add borders, symmetric 1 px color 2
Image, Add borders, uncheck symmetric : (white)
20.
Image, Add borders, symmetric 2 px color 2
Image, Add borders, symmetric unchecked: (white)
21.on the copy you left aside
Layers, merge all
Resize a 25% all layers checked
Image, Add borders, symmetric, 10 px white
Adjust, sharpness, sharpen
Edit/ Copy22.
On the initial work, paste as a new layer
Image, free rotate, right, a 25, other data unchecked
com a pick tool "K" , place it:
Position X 672
Position Y 438
(M)
Effects 3D drop shadow, as before23.
On the Background layer
With the magic tool, select the first white frame :
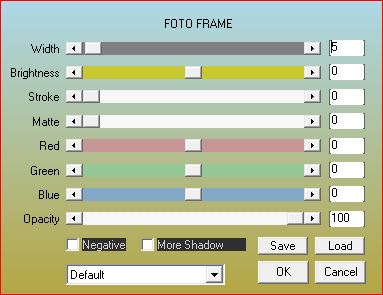
Effects , plugins: AAA Frames - Fotoframe - width at 5
Select none
24.
With the magic tool, select the white frame located below
Repeat the same plugin, same data (Fotoframe)
Selections - Invert
Effects 3D drop shadow as before
Select none25.
Load the tube Deco_cadre, copy
paste as a new layer
Com a Pick tool "K", place it:
Position X 2
Position Y 0
(M)26.
About the background layer of layers
Activate the selection tool "S" , custom selection:
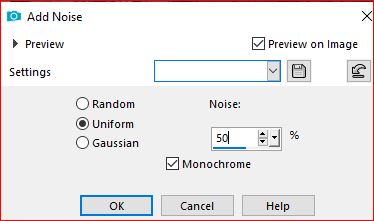
Adjust, add noise:
Adjust, sharpness, sharpen more
Select none27.
Image, Add borders, symmetric:2 px color 2
10 px white
10 px color 2
35 px white28.
Load the woman tube, copy
Paste as a new layer
Resize a 90% all layers unchecked
Colocar to esquerda (as on the final work)
Effects 3D drops shadow, as before
Edit/repeat drop shadow29.
Load the " titre" tube
Activate the changer color tool, apply your color 2, copy
Paste as a new layer
Coma a pick toll "K" , place it:
Position X 770
Position Y 0
(M)30.
Activate the background layer of the layers
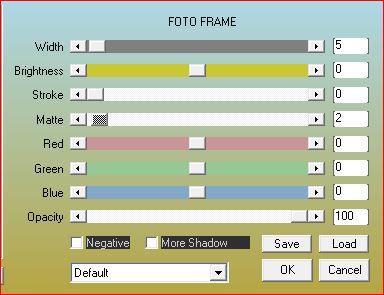
Effects, plugins: AAA Frames - Foto Frame, new data:
31.
Image, Add borders, symmetric: 1 px col0r 2
Image, Resize, width 950 px all layers unchecked32.
Load Deco_1 tube
If you want to change the color:
Select all, float, defloat, fill with your color
Edit/Copy
Paste as a new layer
Pick tool "K", place it:
Position X 760
Position Y 120
(M)33.
Effects , plugins: Alien skin eye candy 5 Impact - Glass
34.
Load Deco_2 tube, copy
Paste as a new layer
Pick tool "K", place it:
Position X 772
Position Y 136
(M)
Layers, merge down
Effects 3D drop shadow, as before35.
Sign and attach the author's watermark
Merge all
Adjust, sharpness, unsharp mask, setting: softSave as jpeg
Inédits de ma conscience


