-
Gear (GB)
Gear
(Engrenagem)

This tutorial is my own, any resemblance to another tutorial is just pure coincidence.
Forbidden to share without my permission.
Autorizations
Tubes, masks, backgrounds, decorations ,WA
Plugins:
On Here
the credits of the images used,
belong to the appropriate authors
My tutorials are protected:

Thank you tubers
Tube : Alenza
Landscape: Nikita
Déco 2 pixabay
Mask : casiop
Decorations , WA: from me
others to be done during the tutorial
Unlimited :
Bkg designer sf10I
.....
AAA Filters
Alien Skin Eye candy 5 Nature
General preparation: Before starting one of my tutorials
This tutorial was created with PSP 2020, can be done with previous versions,
The alpha channel is compatible with pSP7
If you can't open alpha channel: Place the selections in your PSP selections folder
Place the PSP scripts and gradients in the corresponding "regulated" folder.
Most of my filters are in Unlimited, check the filter folder, some work outside of it.
Open the mask on the PSP.
Duplicate the material and work on the copies.
Remove signatures from tubes before use
Double click on presets
 , they will be installed automatically
 You can adapt the colors, the Blend mode of the layers, to your work
Material:
Initial dimensions: 900x600 px
Colors :
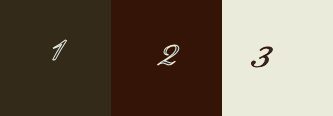
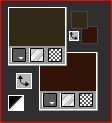
Foreground: 1/ #332a19
Background: 2/ #331407
color 3/ #eaebda
1/
Load the alpha_ gear channel
Selections, select all
Load image "pour fond", copy
about your work: paste into selection
Remove the selection
(if you want to change the colors: fill the alpha with one of your colors,
new layer, paste the background image in the selection,
Blend mode luminance or your choice)
Effects, Image effects, seamless tilling: settings default
2/
Selections, load a selection from alpha channel, sélection 1
Promote selection to layer
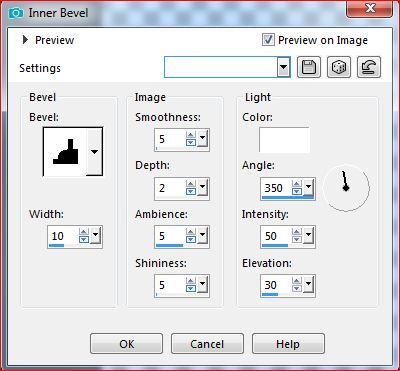
Effects 3 D, Inner Bevel :
Keep selected
3/
Add a new layer
Fill with color 3
Remove the selection
Adjust, Blur, motion blur:

Layers, arrange, move down
4/
activar a layer raster 1
Adjust, blur, gaussien, radius a 20
Preview the layers:

result display:
5/
Add a new layer
Fill with color 2
Layers, New mask layer, from image :

Merge groupe
Adjust, Sharpness, sharpen,
Layers, duplicate
Merge down
Effects, plugins :
Alien skin Eye Candy 5 Nature, Rust : settings : Large, Dark Brown Specks
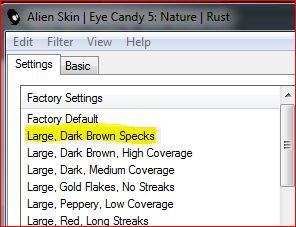
In the basic tab, put color 2

6/
Activate the top layer
load the character tube
Image, Resize a 80% all layers Unshecked
Objects, align, left (to put on the left)
Effects 3D , drop shadow : 30/3/60/15, Black, shadow on new layer checked.

Stay in the layer (shadow)
preview:
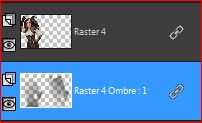
Image effects, seamless tilling, settings : side by side
7/
Enable the layer below
Load, Copy/paste as a new layer ,the landscape tube
Objects, align, horizontal center
Objects, align, top
Layers, arrange, Move down, 2 x
8/
At the top of the layers stack
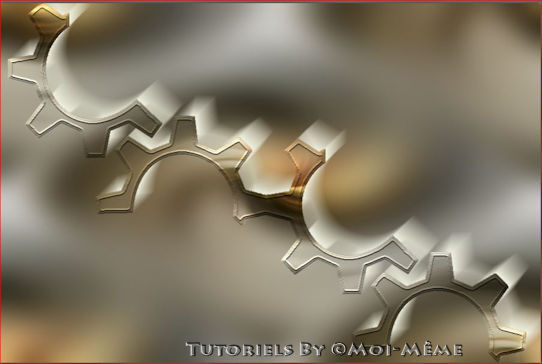
Load, copy and paste as a new layer, the decoration " gear MM"
Image, resize a 90%, all layers unshecked
Pick tool K (Key K to activate it)
put, Position : X 419, Y 199
(Key M to disable it)
Effects 3D, drop shadow: 5/3/60/5 , Black, shadow on new layer unshecked
Image, resize again at 90% , all layers unshecked
Don't move, the decor is in place.
Layers, arrange, Move down
9/
Load the gear_2 decoration, copy and paste as a new layer
Place as in the example
(pick tool k, position: H 600, V 307)
10/
Activate the landscape layer (third from below)
Open, copy and paste as a new layer, deco 3
Layers, propreties, Blend mode, Overlay
(depending on your work, adapt the blend mode of the layer)
11/
Activate the second layer from the bottom (mask)
Add a new layer
Selections, load a selection from alpha channel , sélection 2
Fill with color 3
remove the selection
Effects, distotion effects, wave :

Duplicate this layer
Image, mirror, horizontal
Merge down
Effects, plugins :
AAA Filters, transparent vignette :

Edit, repeat transparent vignette
Arrange, move down
Blend mode, hard light
12/
At the top of the layers stack
Selections, Select all
Add a new layer
Effects 3D, cutout:

Remove the selection
13/
Image, add borders, symmetrics:
2 px color 2
40 px color 3
2 px color 2
20 px color 1
2 px color 2
14/
Activate the magic wand tool, mode replace, tolerance & feather at 0
select the frame at 20 px
Effects, reflection effects, Rotating Mirror :

Adjust, Blur, gaussien , radius at 20
Effects 3D, inner bevel : as previously
15/
select the frame at 40 px
aplicar o plugin: Unlimited, Bkg designer sf10I, Blur’em !...

Alien skin Eye Candy 5 Nature, Rust : Large, Dark Brown Specks, as previously
Adjust, sharpness, sharpen
remove the selection
16/
sign your work
Attach my signature (resize and blend mode soft light)
17/
Copy-paste , o WA, place as in the final example
(In my version 2 , I did: image negatif)
18/
Image add borders, 1 px color 2
Resize width at 950 px
save as JPG/ jepg
contact:
My version 2: Tube from Moi-Même

-
Commentaires
Inédits de ma conscience


