-
Jeans (GB)
Jeans

This tutorial is my own, any resemblance to another tutorial is just pure coincidence.
Forbidden to share without my permission.
Autorizations
Tubes, masks, backgrounds, decorations ,WA
Plugins:
On Here
the credits of the images used,
belong to the appropriate authors
My tutorials are protected:

Thank you tubers
Tubes by: Gabry
Misted de Nikita rêveries
Mask de Béatrice(GB)
Decorations , WA: from me
others to be done during the tutorial
penta.com
Toodies
MuRa’s Meister
General preparation: Before starting one of my tutorials
This tutorial was created with PSP 2020, can be done with previous versions,
The alpha channel is compatible with pSP7
If you can't open alpha channel: Place the selections in your PSP selections folder
Place the PSP scripts and gradients in the corresponding "regulated" folder.
Most of my filters are in Unlimited, check the filter folder, some work outside of it.
Open the mask on the PSP.
Duplicate the material and work on the copies.
Remove signatures from tubes before use
Double click on presets
 , they will be installed automatically
 You can adapt the colors, the Blend mode of the layers, to your work
Material:
Initial dimensions 900x600 px
Colors :

color 1 : #c8cdd3
Background, color 2 : #1b335e
Foreground, Color 3 : #5f78a9
1/
Load thecanal alpha_Jeans2020
Fill with color 3
Effects plugins : penta.com, jeans : at 35/4

2/
Layers, new raster layer
Fill with color 2
Load image: fond pour jeans, copy
On your work: paste as a new layer
Layers, propreties, Blend Mode, hard light, or adapt to your colors
Layers, Merge down
3/
Selections, load a selection from alpha channel, sélection 1
Invert image, checked :

DELETE
Selections, select none
4/
Layers, Duplicate
Image, mirror, mirror horizontal
Layers, Merge down
5/
Effects, geommetric effects, Skew: horizontal and repeat checked, skew angle at 45

Effects plugins : Toodies, Weaver : how to opening
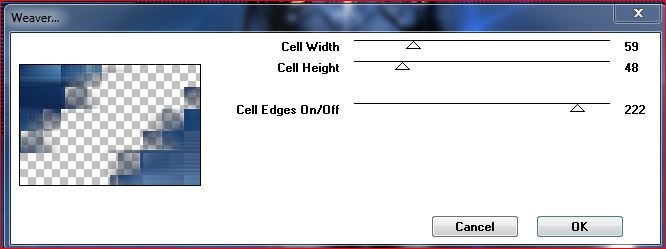
Adjust, sharpness, sharpen
Effects 3 D drop shadow : 2/-2/70/5 black
Edit, Repeat drop shadow
6/
Add a New raster layer
Selections, load a selection from alpha channel, sélection 1, invert image unshecked
On materials, put : foreground , color 1
Fill with color 1
Select none
7/
Layers, Duplicate
Image, mirror, mirror horizontal
Merge down
Apply the plugin: Toodies, weaver as previously
Effects, geometric, skew as previously
Adjust, sharpness, sharpen more
Layers, propreties, Blend Mode, soft light
Apply the plugin : Penta .com, jeans, as previously
8/
Sobre a layer raster 1
Juntar uma nova layer
Selections, load a selection from alpha channel, sélection 2
Carregar o misted paysage (or the one of your choice)
Copy/paste, into selection
Select none
Blend Mode, hard light (or according to your colors)
Adjust, sharpnees, sharpen
9/
At the top of the layers stack
Add a new raster layer
Fill with color 3
Load the mask : Mask_GB_01.jpg
Layers, New mask layer from image :

Duplicate , Merge Group
Layers, propreties, Blend Mode, dodge (or according to your colors)
10/
Layers, merge visibles
11/
Selections, load a selection from alpha channel, sélection 3
Promote selection to layer
Select none
Objects, align, bottom
Selections, select all
Effects plugins: MuRa’s Meister, Perspective Tiling:

Select none
Effects 3 D drop shadow: 2/-2/70/40 color 3
Effects, reflection effects, Rotating mirror :

12/
Image, add borders, symmetric:
2 px color 2
Select all
Add borders , symmetric, 5 px color 1
Selections, invert
Apply the plugin : penta.com , jeans, as previously
Effects, Edge effects, enhance
13/
Select all
Add borders , 40 px, color 3
Selection, invert
Apply the plugin: penta.com , jeans, as previously
Keep selected
Add a new raster layer
Effects 3 D, cutout, color 2

Merge down
Selections, invert
Effects 3D drop shadow : 0/0/70/40 Black
Select none
14/
Load decoration: Déco_latérale_Jeans, copy
On your work: paste as a new layer
Apply the drop shadow as previously
15/
Load the main tube (woman to me), copy
On your work: paste as a new layer
Image, resize a 80%, all layers Unshecked
Adjust, sharpness, sharpen
Place on the right as on the final example, or with the pick tool K:
Position : X 551, Y 44
Apply the drop shadow as previously
16/
Copy/paste the title: WA titre
put with pick tool K:
position : X 204, Y 52
17/
Sign your work
Add my signature (resize, blend mode soft light)
18/
Image, add borders, symmetric : 1 px color 2
Resize, width at 950 px
Save as JPG/jepg
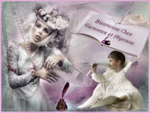
My version 2, I kept the normal background image, Tine tube, misted from myself:

Your versions are following the original tutorial, Thank you !!!
Inédits de ma conscience


