-
Luz Cristina (eng)
Luz Cristina
This tutorial is by Béa
Thank you Béa, for allowing me to translate your tutorial
This tutorial is protected by copyright
The material provided is protected by the authors of the tubes
It is prohibited to appropriate or modify the original and / or signatures.
Any dissemination without written authorization is prohibited.
Original Tutorial: On Here
Version conforms to the original:

My version: tube by Luz Cristina, vaso de wieskes, Obrigado
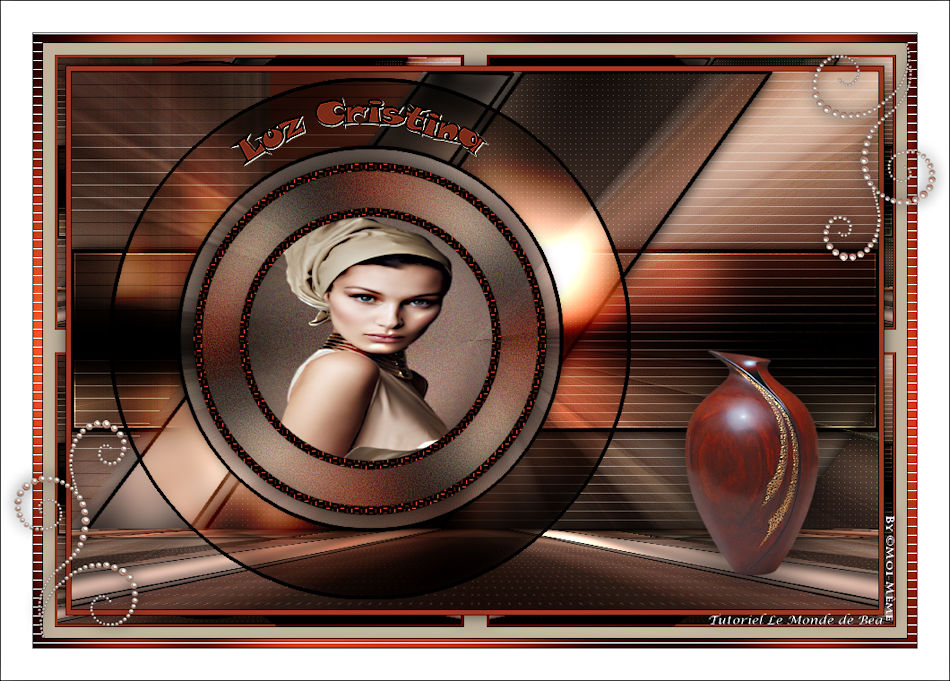
Material: On Here
Guide:
1.
Cores originais:

color 1 #ffd9b9
color 2 #b00606
color 3 / Black2.
Load the file Alpha_LuzCristina
Window/Duplicate
Close the original, work on the copy3.
fill in black
Layers, new raster layer
Load the tube mulher
Edit/ Copy
*On your work:Selections, select all
Edit/paste into selection
Selections, select none4.
Effects Image effects, seamless tilling, setting: DefaultAdjust, Blur, radial

Layers, merge visibles
Effects , Edge effects, enhance more5.
Selections, Load a selection from alpha channel, sélection 1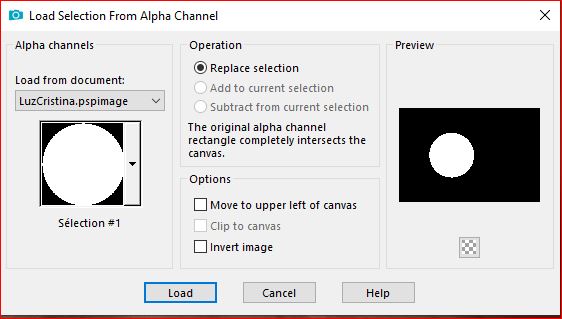
Selections , promote selections to layer
Adjust, Blur, gaussien, radius at 30
Effects , Textures, Grain:
6.
layers, new raster layer
Get back on the tube woman , copy
* paste into selection
Select none7.
Put color 1 in the foreground and color 2 in the background
Selections, Load a selection from alpha channel, sélection 2
layers, new raster layer
Effects, plugins: Mehdi - Wavy lab 1.1: In Mode, put Black 3erd place
Adjust, Blur, Gaussien, radius at 30
Effects, Textures , Grain, as abefore
Sharpness, sharpen more8.
Selections, Modify, Select the selection borders:
Layers, new raster layer
Fill in black
Effects, textures, weave, Color 2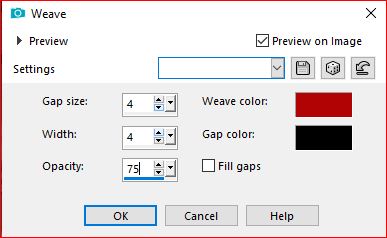
Sharpness, sharpen more
Select none9.
Layers, merge down, 3 times
Effects 3D drop shadow 0 / 0 / 75 / 25 black
On the Merged layer
Selections, load a selection from alpha channel, selection 3
Selections , Promote selection to layer
Effects 3D drop shadow, as before10.
On the Merged layer
Selections, load a selection from alpha channel, sélection 4
the new selection replaces the previous one
Selections, promote selection to layer
Layers, arrange, move up
Adjust, blur, gaussien at 10
Effects, plugins: Graphic Plus - Cross Shadow , how to opening11.
Selections, Modify , select the selection borders
Fill in black
Select none
Layers, propreties, Blend mode, hard light12.
On the Merged layer
Selections, load a selection from alpha channel, sélection 5
Selections , Promote selection to layer
Effects, plugins: L&K - Mayra:
Effects 3D drop shadow, as before
Select none
Layers, propreties, Blend mode, soft light13.
On the Merged layer
Selections, load a selection from alpha channel, sélection 6
Selections , promote selection to layer
Effects, plugins: Carolaine and Sensibility - Cs-LDots: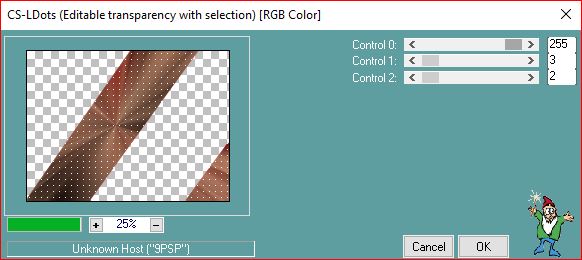
Effects 3D , drop shadow, as before
14.
Selections, Modify, select the selection borders:
Fill in black
Select none
Layers, propreties, Blend mode Multiply15.
On the Merged layer
Selections , load a selection from alpha channel, sélection 7
Selections , promote selection to layer
Effects, plugins: Ap Lines - Silverlining:
Select none
Layers, propreties, Blend mode soft light16.
On the Merged layer
Selections , load a selection from alpha channel, sélection 8
Selections , promote selection to layer
Adjust, Blur, gaussien radius at 10
Effects, plugins: Graphic Plus - Cross Shadow , how to opening
Effets 3D drop shadow as before17.
Selections, Modify, select the selection borders: as before
Fill in black
Select none18.
On the Merged layer
Activate the selection tool (S), custom selection:
Selections, promote selection to layer
Adjust, Blur, gaussien at 10
Effects, plugins: Graphic Plus - Cross Shadow , how to opening
Effects 3D , drop shadow, as before19.
Selections, Modify, select the selection borders: as before
Fill in black
Select none
Layers, propreties, blend mode, Overlay
Effects, Edge effects, Enhance more20.
Layers (author's print) :
Close (without activating) the eye of the 3 circle layers (as above in the print)
Layers, merge visibles
21.Layers, Duplicate
Effects, plugins: Mura's Meister - Perspective tiling:
Effects, reflection effects, rotating mirror :

Effets 3D Drop shadow 0 / 0 / 100 / 100 , black
22.
Activate the layer at the top of the layersLayers - vieux - all
Load the flower vase tube by Luz Cristina, copy
* paste as a new layer
Image, resize a 50% , all layers unshecked
Place bottom right (see final example)
Effects 3 D, Drop shadow as before23.
Load the titre tube, copy
* Paste as a new layer
Put inside the circle, how about the final example(to change the color: select all, float, defloat, contract at 2, fill with color of your choice, deselect)
24.Selections, select all, float, defloat
Effects 3D drop shadow 1 / 1 / 50 / 1 color 1
Select none
Adjust, sharpness, sharpen25.
Image, Add borders, symmetric:
1 px black
5 px color 2
1 px black
Selections, select all
Image, Add borders, symmetric: 25 px de color 1
Selections, Invert
Effects, plugins: Unlimited - &<Bkg Kaléidoscope> Cake Mix , how to opening
Selections, Invert
Effects 3D drop shadow 0 / 0 / 65 / 25 black
Select none26.
Image, Add borders, symmetric:
1 px black
10 px color 2
1 px black
Activate the magic tool, Select the 10 px border
Effects, plugins:Graphic Plus , Cross Shadow , how to opening
Ap Lines - Silverlining, as before:
Effects 3D , drop shadow, as before
Select none27.
Image, Add borders, symmetric: 35 px white
Load the Deco 68 tube by Luz Cristina, copy
* paste as a new layer
Image, Resize a 40% all layers unshecked
Image, Mirror, vertical
Place in the upper right corner (see the final example)
Effects 3D drop shadow 0 / 0 / 75 / 25 black28.
Layers, Duplicate
Image, Mirror, horizontal
Image, Mirror, vertical29.
Sign and add the author's watermark30.
Image, Add borders, symmetric: 1 px black
Image, Resize, width at 950 px
Adjust, sharpness, unsharp mask, setting: softSave as jpeg
-
Commentaires
Inédits de ma conscience


