-
Mai 2 (GB)
Mai 2

This tutorial is my creation, any resemblance to any other tutorial is pure coincidence.
Prohibited from sharing without my permission.
Autorisations
Tubes, masks, backround, décos ,WA
Plugins :

On Here
Credit for the images used belongs to the author
My tutorials are protected by:

Main tube by: Danimage
masques de Narah
bouquet de muguet de Fashion créations
branches déco de chez png free
Thank you!
WA et décos, misted : by Moi-Même
others to do during the tutorial
Unlimited, Bkg Designers sf10II
MuRa’s Meister
AFS Import, Sqborder 2
General preparation: Before starting one of my tutorials
This tutorial was created with PSP 2020, can be done with previous versions,
The alpha channel is compatible with pSP7
If you can't open alpha channel: Place the selections in your PSP selections folder
Place the PSP scripts and gradients in the corresponding "regulated" folder.
Most of my filters are in Unlimited, check the filter folder, some work outside of it.
Open the mask on the PSP.
Duplicate the material and work on the copies.
Remove signatures from tubes before use
Double click on presets
 , they will be installed automatically
 You can adapt the colors, the Blend mode of the layers, to your work

Material:
Initial dimensions: 900x600 px
Place the file (the frame) Mai 2_MM, in the Frames folder of your PSP
Cores:

Foreground, color 1: #c9dac5
Background, color 2: #65772d
1/
Load the canal alpha Mai 2
Fill with color 1
Selections, select all
2/
Load the main tube (woman in my case)
(if your tube has many transparent margins, with the selection tool (S), select the tube and cropt to selection)
Edit/copy
On your work : Edit/paste into selection
Selections, select none
Adjust, Blur, Radial:

Effects, plugins :
Unlimited, Bkg Designers sf10II, Evanescence

3/
Layers, Duplicate
Effects , plugins :
Unlimited, Bkg Designers sf10II, MirroirChaos

MuRa’s Meister, Perspective tiling :

Duplicate
image mirror, mirror vertical
Layers, merge down
Effects, geommetric effects, spherize :

4/
Selections, select all, Modify, Contract at 20
Selections, Invert
Effects, plugins : (Unlimited if your case) AFS Import, Sqborder 2, how to opening
Selections, Invert
5/
Layers, New raster layer
Effects 3D, cutout :

Select none
6/
On the layer below
Effects 3D drop shadow : 0/0/50/50 black
Load the tube déco florale, copy
On your work : paste as a new layer
Put it on top : Objects, align, top (see the final example)
Layers, propreties, Blend mode, multiply
7/
On the layer raster 1
layers, new raster layer
Fill with Color 2
Load the mask : NarahsMasks_1555
Layers, new mask layer from image :

Layers, merge group
Effects, plugins : (Unlimited if your case) AFS Import, Sqborder 2, how to opening
Selections, load a selection from alpha channel, sélection 1
DELETE
Select none
8/
On the top of layers
layers, new raster layer
Fill with color 2
Carregar o masque : NarahsMasks_1340
Layers, new mask layer from image :

duplicate
Effects, Edge effects, enhance
Merge group
Effects, plugins : (Unlimited se o seu caso) AFS Import, Sqborder 2, how to opening
Effects 3 D , drop shadow: 0/0/50/10 black
Layers, propreties : Blend mode, multiply
(or another, depending on your work)
9/
On the layer raster 1
Activate the main tube , copy/paste as a new layer
Reload the Sélection 1
(if nécéssairy and according to your tube, place using the move tool (M), to keep only the part of the tube you want)
Selections, invert
DELETE
Select none
Blend Mode , multiply (adapt to your work)
10/
Activate the top layer
Edit/ paste as a new layer (character tube still memorized)
Image, mirror, mirror horizontal
Resize a 70%, all layers unshecked
coloque em baixo à direita à droite , see example
Effects 3 D, drop shadow : 0/0/50/50 black
11/
Load the tube fleurs de muguet (lily of the valley flowers), copy
On your work : paste as a new layer
Place it with the pick tool K (K Key):
Position : X 0, Y 283

(M Key to deselect the tool)
Effects 3 D , drop shadow : 0/0/50/10 black
12/
Selections, select all
Image, add borders , symmetric :
1 px color 2
13/
Layers, new raster layer
Effects 3 D, cutout, as abefore
Merge down
Select none
14/
Image , picture frame
Select the frame provided : Mai 2_MM, Ok to validate

Current layers:
you can adapt the colors of the frame to your colors with the changer color tool.

(Note: if you have a problem with the frame:
the png image is in the material, adapt to your colors
select the inside of the frame
copy your work (not selected)
and paste in the selection, deselect)
15/
Sign and add my signature
16/
Load the tube texto ( texte), copy/paste as a new layer
place it with the pick tool K :
Position X 242, Y 556
Blend Mode, multiply
17/
Add borders , 1 px color 2
Image, Resize width a 950 px
Save
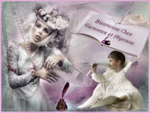
My version 2
tube by Moi-Même

Merci Anja pour ses traductions et le test de ce tuto

Merci Alyciane pour avoir testé ce tuto

Merci Béa pour avoir testé ce tuto

Inédits de ma conscience


