
-
Symphonie d'Automne(pt)
Symphonie d'Automne
Sinfonia de Outono
Este tutorial é da autoria de Cloclo

Obrigado por a sua confiança e o seu pedido para a tradução dos seus tutoriais
Nota da Autora:
É estritamente proibido copiá-lo ou distribuí-lo na web, blogs, forum sem minha permissão por escrito.
Este tutorial foi realizado com Corel PaintShop pro 2020
Mas também pode ser realizado com outras versões PSP
traduzido com PSP ult. 2019
(se utilizar tubes com licença, não esqueça de a colocar sobre o seu trabalho)
Tutorial original AQUI
Versão conforme ao original:

A minha: tube principal de VM , paisagem de Sylvie, jarra de flores desconhecido, Obrigado

Material a descarregar no site da autora, AQUI
Plugins :
FM tile Tools
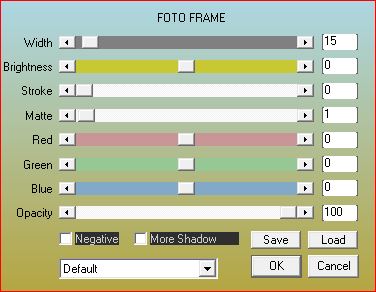
AAA Frame / FOTO FRAME
MuR'as Meister / Perspective Tiling
Alien Skin / Eye Candy 5 Impact / Perspective Shadow
I.C.Net Software, Filters Unlimited 2.0:
Filter Factory Gallery D
Tramages
Toadies
1
Cores originais:

Foreground: #a98744 , cor 1
Background: #af4f15, cor 2
cor 3: #753b16
cor 4: branco
cor 5: preto
Carregar o ficheiro alpha_symphonie_d_automne
Duplicar, Fechar original, trabalharemos sobre a copia
Na paleta layers, clica direita, Rename, raster1
2
Selections, select all
carregar a imagem background, Edit/ copy
*Sobre o seu trabalho: Edit/paste into selection
Selections, select none (remover a selecção)
Effects, Image effects, seamless tilling, setting : Default
Adjust, blur, gaussien , Radius a 30

Layers, new raster layer (juntar uma nova layer)
Preencher com a cor 2
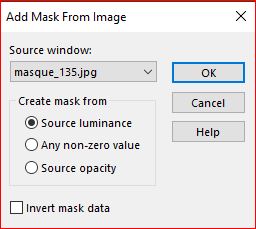
carregar o mask: masque 135
Layers, new mask layer from image:
Layers, merge group
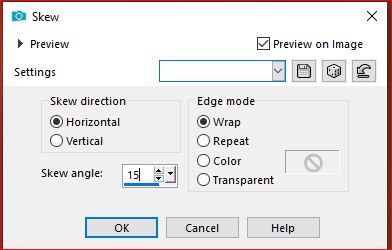
Effects, geometric effects, skew:
Duplicar esta layer (layers, duplicate)
Image, mirror, mirror horizontal
Image, mirror , mirror vertical
Layers , merge all (flatten)
3
Juntar uma nova layer
Preencher com a cor 1
Carregar o mask: creation.tine_masque370
Layers, new mask layer. from image:

Layers, merge group
Effects , Edge effects, enhance
Effects, 3 D, drop shadow 3 / 3 / 80 / 15 , preto
Duplicar esta layer
Image mirror, horizontal
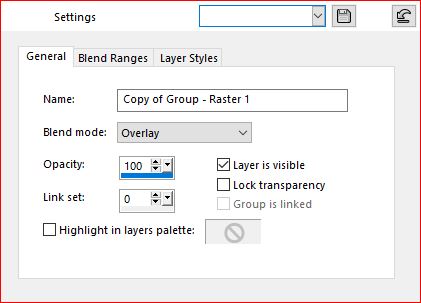
Layers, properties, blend Mode, overlay:
Layers, merge all (flatten)
Effects, plugins: FM Tile Tools / Blend Emboss , como à abertura

4
Selections, load a selection from alpha channel, Cloclo1
Selections, promote selection to layer
Adjust, bleu, gaussien, radius a 20
Effects, plugins: I.C.Net Software / Filters Unlimited 2.0 / Tramages / Tow The Line:

Remover a selecção
rotating mirror, setting: Default

5
Effects, plugins: MuR'as Meister / Perspective Tiling

Adjust, sharpness, sharpen
Layers , properties: colocar Opacity a 65
Effects, 3 D, drop shadow: 5 / 5 / 100 / 40 , preto
Sobre a layer Background (fundo)
Selections , load a selection from alpha channel, Cloclo2
Selections, promote selection to layer
Layers, arrange, bring to top
Adjust, Blur, gaussien, Radius a 20
Manter seleccionado
Carregar o misted paisagem , copy
* paste into selection
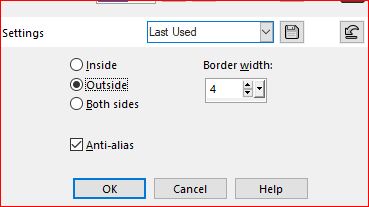
Selections, Modify, Select the selection borders:
Juntar uma nova layer
Preencher com a cor 3
6
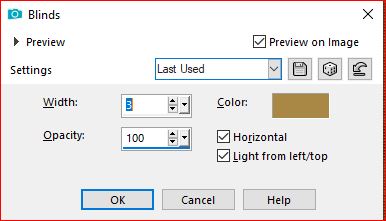
Effects, textures, blinds, cor 1
Effects , 3 D , Inner bevel:

Remover a selecção
Layers, merge down
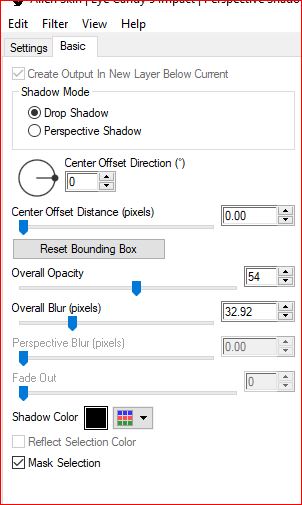
Effects, plugins: Alien Skin Eye Candy 5, Impact ,Perspective Shadow
Aplicar o preset : Shadow_symphonie_d_automne
Basic , se necessário:
Carregar o tube Glass_Cloclo , copy
*paste as a new layer
colocar no centro do circulo (Ver o exemplo final)
Layers, properties, opacity a 55
Layers, merge down
Activar a pick tool (Letra K ), colocar :
Position: X 230 / Y 81
(Letra M para desmarcar)
7
Juntar uma nova layer
Selections, load a selection from alpha channel, Cloclo3
Colocar as cores: foreground, cor 1 / background cor 3

Preparar um gradient, linear:

Remplir du dégradé
8
Effects, plugins: I.C.Net Software / Filters Unlimited 2.0 / Filter Factory Gallery D / Tunnel Tile:

Se você não conseguir o mesmo resultado: tente com o plugin fora de Unlimited
Remover a selecção
Juntar uma nova layer
Selections, load a selection from alpha channel , Cloclo4
Preencher com o gradient memorizado
Remover a selecção
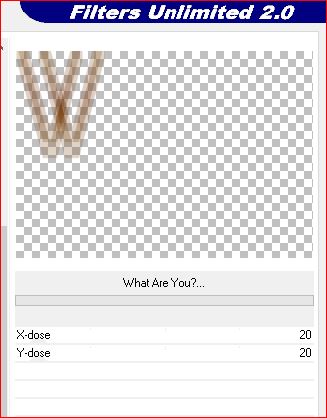
Effects, plugins:
Toadies / What Are You? , como à abertura
Alien Skin , Eye Candy 5, Impact, Perspective Shadow , memorizado
Adjust, sharpness, sharpen more
Edit, repeat, sharpen more
9
Layers, arrange, move down
Activar a layer acima
Layers, merge down
Layers, duplicate
Image, mirror, horizontal
Merge down
Sobre a layer promoted selection 1 ( layer da paisagem)
Duplicar esta layer
Image, Resize a 40 % , all layers desmarcado
Activar a pick tool ( K), colocar:
Position X 48 / Y 257
(M)
Layers, arrange, bring to top
Duplicar esta layer
Image mirror, horizontal
Merge down
10
Carregar o tube déco_Cloclo1 , copy
*Paste as a new layer
Activar a pick tool (K), colocar:
Position X 118 / Y 22
(M )
Duplicar
Image, mirror , horizontal
Merge down
Effects , 3 D, drop shadow 1 / 1 / 70 / 2 , preto
Adjust, sharpness, sharpen
Carregar o tube note_music_Cloclo, copy
*Paste as a new layer
Activar a pick tool (K), colocar:
Position X 257 / Y 117 /
(M)
11
Carregar o tube texte_Cloclo , copy
*Paste as a new layer
Activar a pick tool (K), colocar:
Position X 298 / Y 12
(M)
Carregar o tube banc_Cloclo , copy
*Paste as a new layer , colocar em baixo à esquerda (ver o exemplo final)
Carregar o tube mulher, copy
*Paste as a new layer , colocar em baixo à direita (ver o exemplo final)
Aplicar uma drop shadow de sua escolha
Image, Add borders, symmetric: de 2 pixels Cor 1
Edit/copy
Selections , select all
Add borders symmetric: de 45 pixels , branco
Selections, invert
Édit/paste into selection (imagem memorizada)
Adjust, blur, gaussien, Radius a 30
12
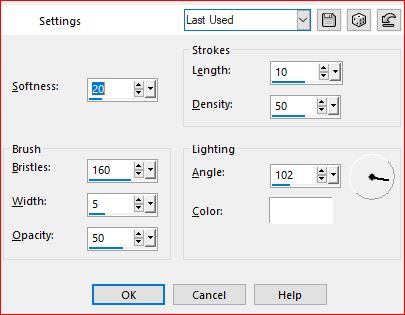
Effects, art media , brush strokes
13
Effects , Edge effects, enhance
Manter seleccionado
Effects , plugins: AAA Frame / FOTO FRAME:
Selections, Invert
Effects 3 D, drop shadow 5 / 5 / 70 / 45 , preto
Remover a selecção
Carregar o tube coins_Cloclo, copy
*Paste as a new layer , não mover
(opção pessoal: eu juntei uma nova layer, select all, paste into selection)
Image, Add borders de 1 pixel , preto
14
Assinar et juntar o watermark da autora
Layers, merge all
Image, Resize, width a 1000 pixels
Salve em JPG
Tradução por:

-
Commentaires
Inédits de ma conscience
-
O crédito das imagens utilizadas
pertence ao devido Autor
Os meus tutoriais e traduções são protegidos por:

Interditos de qualquer difusão sem a minha autorização
Agradeço o respeito por o meu trabalho.

-


