-
Tout en Plumes (Eng)
Tout en Plumes
All in feathers
This tutorial is by Béa
Thank you Béa, for allowing me to translate your tutorial
This tutorial is protected by copyright
The material provided is protected by the authors of the tubes
It is prohibited to appropriate or modify the original and / or signatures.
Any dissemination without written authorization is prohibited.
Tutorial translated with PSP 2019
Original Tutorial On Here
Version conforming to the original: tubes from material
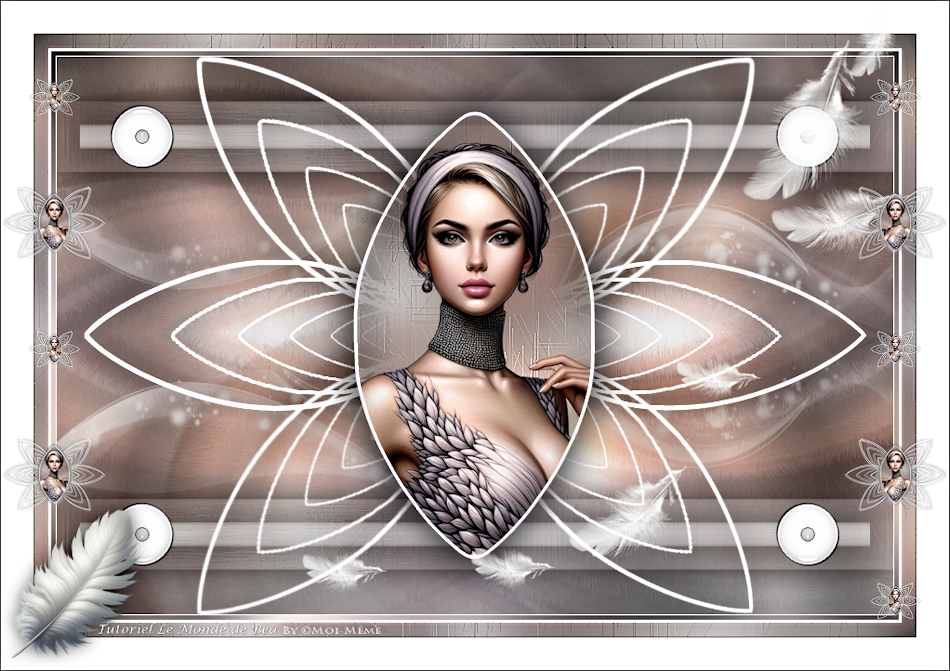
My version: tube AIgenPar Moi-Même


Material On Here
Colors used: white and black
Plugins:
Graphic Plus
Filters Unlimited
Mura's Meister
Guide:
1.
Load the File Alpha_Plume
window/Duplicate
Close original, continue on copy
2.
Load the tube femme, remove signature
(keep it open on your PSP for later)
Edit/ Copy
*On your work : selections, select all
Edit/paste into selection
Selections , select none
3.
Effects, Image effects, seamless tilling, settings: Default

Adjust, blur, radial:

Layers, merge all (flatten)
Effects, Edge effects, enhance
4.
Effects, plugins: (Filters Unlimited para mim) Graphic Plus - Cross Shadow
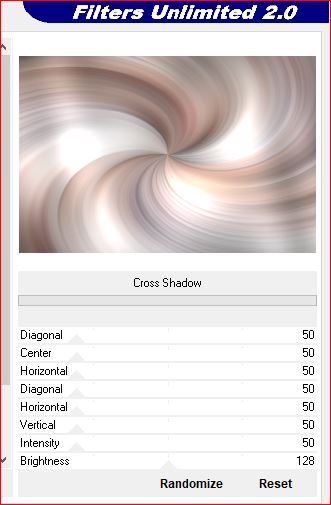
On materials palette, Right click, promote Background layer

5.
Effects, textures, Fur:

Adjust, sharpness, sharpen more
Layers, Duplicate
6.
Effects, plugins: Filters Unlimited, VM Toolbox , MirrororriM:

Effects, reflection effects, rotating mirror, setting: Default

Layers, properties, Blend Mode, Multiply
7.
Selections, load a selection from alpha channel, sélection 1
Layers, new raster layer
Fill in white
Selections, select none
8.
Layers, Duplicate
Effects , reflection effects: Feedback :

Selections, load a selection from alpha channel, sélection 2
DELETE
Selections , select none
Layers, merge down
9.
Acivate the Raster 1 layer
Selections, load a selection from alpha channel, sélection 3
Selections, promote selection to layer
Layers, arrange, bring to top
Adjust, blur, gaussien , radius at 25
10.
Effects, textures , Fur , setting: Stitches transparent

Adjust, sharpness, sharpen more
Edit/repeat sharpen more
11.
On the woman tube, copy
*Paste as a new layer
Image, resize at 45% , all layers unshecked (adapted to your tube)
Activate a move tool (M), place it into selection
Selections, Invert
DELETE
Selections, Invert
Selections, Modify, Select the selection borders

12.
Layers, new raster layer
Fill in white
Selections , select none
Effects 3D, drop shadow: 0 / 0 / 100 / 50 black
Layers, merge down, 2 times
Repetir: Effects 3D, drop shadow 0 / 0 / 100 / 50 black
13.
Activate the layer below (Raster 2)
Layers, Duplicate
Image , free rotate:

Layers, Duplicate
Image , free rotate: as before
Edit/ repeat free rotate
Layers, merge down, 2 times
Effects 3D , drop shadow, as before
14.
On the Raster 1 layer
Selections, load a selection from alpha channel, sélection 4
Selections, promote selection to layer
Layers, arrange, move up
Adjust, blur, gaussien, as before (memorized)
Effects, textures , Fur , setting: Stitches

Adjust, sharpness, sharpen more
Effects 3D, drop shadow, as before (memorized)
15.
Selections, Modify, Contract at 25
Fill in white
Apply the preceding drop shadow
Selections , select none
16.
Layers, Duplicate
Image , Mirror, vertical
17.
Activate the top layer of layers
Layers, merge down (the frame of the woman and the petals)
Edit/ Copy
Edit/paste as a new image, leave aside (save as a precaution)
Current layers:

18.
We are at the top of the layers
Load the Deco tube, copy
*paste as a new layer
19.
On the second layer from the bottom
Juntar uma nova layer
Preencher de branco
Load the mask: VSP240
Layers, new mask layer from image :

Layers, Duplicate
Layers, Merge groupe
Layers, properties, Blend Mode , lighten, Opacity 70

20.
Layers, Duplicate
Image, Mirror vertical
Blend Mode, lighten, Opacity 50
21.
Image, Add borders, symmetric:
1 px white
Select all
Image, Add borders, symmetric:
5 px white
Effects, Image effects, seamless tilling, settings: Default
Selections, Invert
Adjust, blur, Gaussien, as before (memorized)
Effects, plugins: Graphic Plus, Cross Shadow, How to opening
Selections , select none
22.
Image, Add borders, symmetric:
3 px white
Select all
Image, Add borders, symmetric:
15 px white
Effects, Image effects, seamless tiling, setting default
Selections , Invert
Adjust, blur, gaussien, as before
Effects, textures, Fur:

Adjust, sharpness, sharpen more
Selections , select none
23.
Image, Add borders, symmetric:
1 px black
35 px white
24.
About the image you left aside:
Image, Resize at 15% , and at 85% (all layers unshecked)
Effects 3D drop shadow 1 / 1 / 100 / 1, white
Edit/Copy
*paste as a new layer
Activate the pick tool (K key), place it:
Position X 0
Position Y 200
(M Key to uncheck)
Effects , plugins: Mura's Meister , Copies:

Adjust, sharpness, sharpen
25.
Activate the selection tool (S key):
Make a small rectangle selection in the top left corner

DELETE
Selections , select none
Layers, Duplicate
Image , Mirror horizontal
26.
Sobre a layer Background
Carregar o tube Deco_plume, copy
*Paste as a new layer
Activate the Pick tool (K) , place it:
Position X 324
Position Y -5
(M)
27.
On the top layer
Load Plume_01_Lemondedebea, copy
*Paste as a new layer
Image, Resize at 20% , all layers unshecked
Place it in the lower left corner
Effects 3D , drop shadow: 0 / 0 / 65 / 25 black
28.
Sign and add the author's watermark
29.
Image, add borders, symetric: 1 px black
Resize, width at 950 px
adjust, sharpness, unsharp mask, soft
Save as jpeg
Translated by:
Inédits de ma conscience


