-
Viking (pt)
Viking

Este tutorial é de minha criação
Qualquer semelhança com outro tutorial é pura coincidência
É interdito a difusão sem a minha autorização
Autorizações
Tubes, masks, fonds, décos ,WA
plugins :
Tube de : Lisa T, Merci !
Misted , Wa, déco: Moi-Même
autres à réaliser durant le tutoriel
Unlimited :
BKg Designers IV
Bkg designer sf10 IV et sf 10I
...
Alien Skin Eye Candy 5, Impact
As minhas traduções são protegidas

Dimensão initial: 900x600 px
Couleurs:

1/ #cfae79
2/ #75a07f
3/ blanc
Preparação:
Antes de começar um dos meus tutoriais:
Clica dupla (esquerda) no preset, elle instala-se automaticamente
Abrir o/os mask no seu PSP
Remover as assinaturas (watermark) dos tubes antes da sua utilização
Duplicar o material e trabalhar sobre as copias
1/
Abrir o canal alpha_viking
Selections, select all
Abrir a Imagem nomeada: fond
Edit/ copy
Sobre o seu trabalho : Edit/paste into selection
Remover a seleção (selections, select none)
(Para modificar a cor da imagem fond (fundo): pode, entre outros, preencher o alpha com uma das suas core, juntar uma nova layer, colar o fundo na seleção, adaptar o Blend mode da layer, merge down. )
2/
Effects plugins:
Unlimited, Background Designers IV, sf10 slice N dice:

Effects , edge effects, enhance
Unlimited, Backgroung Designers IV, Lakeside reflection


3/
Juntar uma nova layer (new raster layer)
Selections, select all
Abrir 0 misted Bateau_MM, ou o tube da sua escolha
Edit/Copy
Edit, Paste into selection
Remover a seleção
Image, Mirror, mirror horizontal
Effects plugins:
Alien Skin Eye Candy 5, Impact, prespective shadow :
Applicar o preset Viking
Basic se necessario:

4/
Activar a layer raster 1
Selections, load a selection from alpha channel, Sélection 1
Promote selection to layer
Layers, arrange, bring to top
Remover a seleção
Image, mirror, mirror vertical
Effects, reflection effects, Feedback :

Image, resize a 101% , all layers desmarcado
Effects 3D effects , drop shadow : 3/3/40/10, preto

Effects, plugins :
Unlimited, Bkg Designers IV , Night Shadow pool :

layers actuais :

5/
Abrir o tube déco 3, Copy
Edit, paste as a new layer
Objects, align, left.
6/
Colocar a cor Branca em foreground
Activar a flood fill tool, opacity a 70
Juntar uma nova layer
Preencher de branco
Repor a opacity da flood fill a 100.
Layers, new mask layer, from image :


Merge group
Layers, properties, Blend Mode , Overlay
7/
Abrir le pspimage éclairMM, copiar a raster 1
Sobre o seu trabalho: paste as a new layer
Activar a pick tool K (tecla K):
Colocar: Position : X -16, Y -58
8/
Abrir lo tube déco_tutoV
Edit, copy/paste as a new layer
Pick tool K:
Position : X 0, Y 225
Tecla M para remover a seleção da pick tool
9/
Image add borders, symmetric marcado
2 px cor 1
1 px cor 2
Select all
Add borders, 30 px blanc
3 D Effects drop shadow : 0/0/80/40 preto
Ne rien sélectionner
10/
Image, add borders , symmetric marcado :
1 px cor 1
1 px cor 2
5 px branco
Activar a Magic wand, tolerance e feather a 0
Selectionar o bordo de 5 pixels
Effects, plugins:
BKg designer sf 10I cruncher à 20/20
Edge effects, enhance
Selection, promote to layer
Blend Mode, multiply
merge down
remover a seleção
11/
Copy/paste o tube personagem
Image resize a 80 %, adapte ao seu tube
Adjust, sharpness, sharpen
colocar : Objects, align, right
3D Effects drop shadow: 0/0/80/10, preto
12/
Abrir/Copy/Paste as a new layer, o tube déco cadre viking.
13/
Abrir o WA viking
Copy/paste as a new layer
colocar como sobre o exemplo final, adapte ao seu trabalho
Blend mode, Overlay.
14/
Assinar
Juntar a minha assinatura (resize/ blend mode soft light)
15/
layers, merge all
Image resize width a 950 px
Adjust,sharpness, Unsharp mask : 2/15/4 (luminance only marcado)
16/
Salvar em JPG/jepg
Versão 2: misted de Moi-Même, tube desconhecido, Obrigado!

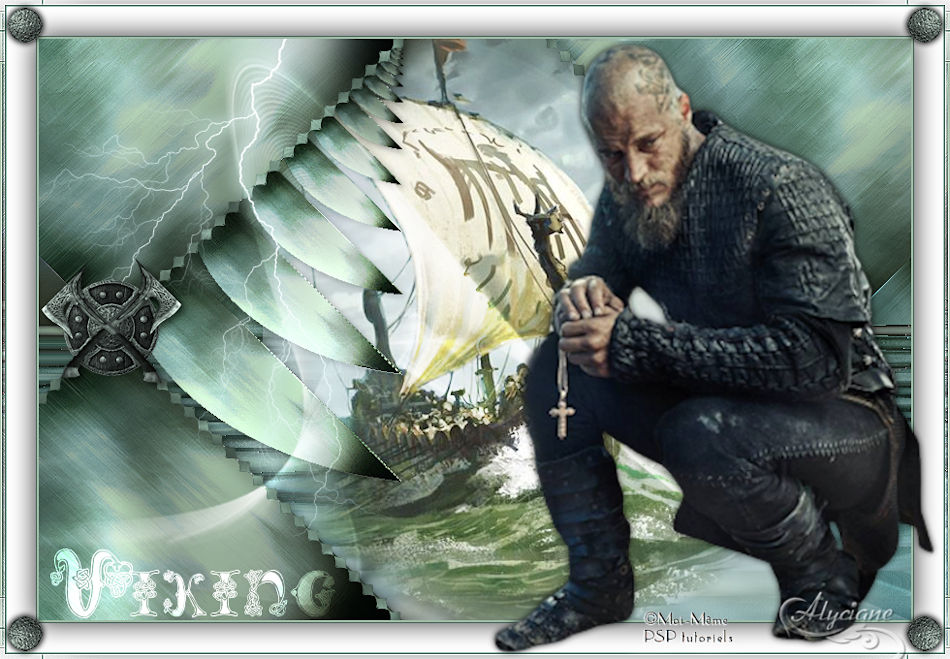
Merci Alyciane pour avoir testé ce tutoriel
Sa version réalisée avec ses tubes:
Merci Anja pour avoir testé et traduit en NL ce tutoriel
Sa réalisation:

Inédits de ma conscience


