-
Par ©Moi-Même le 6 Août 2023 à 16:07
Lana
This tutorial is by Béa
Thank you Béa, for allowing me to translate your tutorial
This tutorial is protected by copyright
The material provided is protected by the authors of the tubes
It is prohibited to appropriate or modify the original and / or signatures.
Any dissemination without written authorization is prohibited.
Original Tutorial: On Here
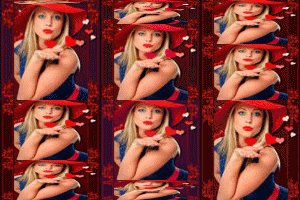
Versão conforme ao original:

A minha versão, tubes de Lana, Obrigado:
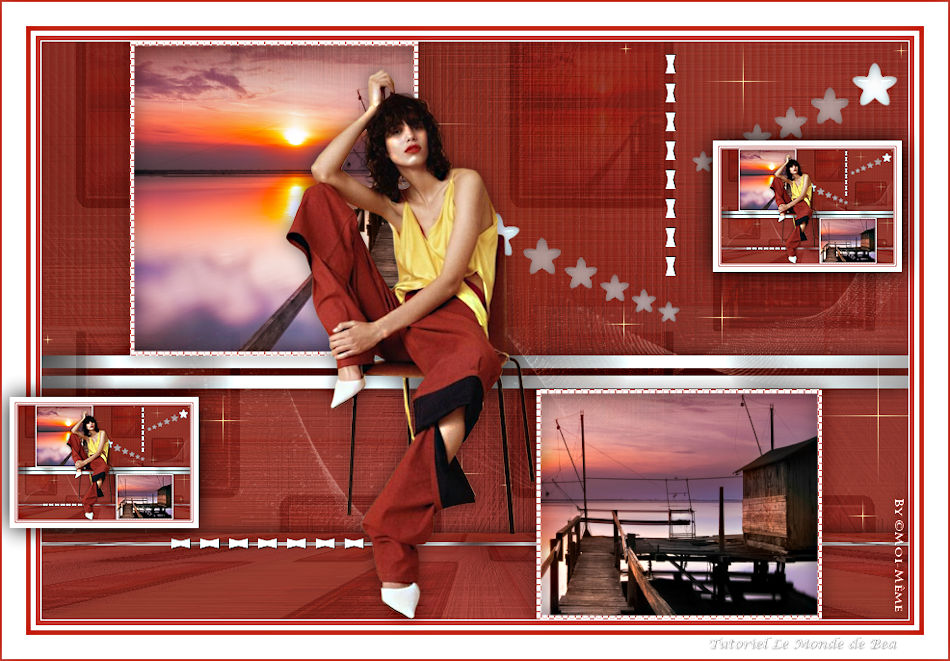
Material : On Here
(remove signatures from tubes before using the tubes)
Plugins:
Unlimited - Graphic Plus -
Mura's Meister - Alien skin eye Candy 5 Impact
Roteiro:
1.
Load the woman tube
Edit/copy
Choose a dark color for the foreground2.
original colors:

Foreground, color 1 #7c2165
Background color 2 (white)3.
Ouvrir Alpha_Lana, (duplicate, close the original, work on the copy)4.
Selections , Select all
*On your work: Edit/paste into selection
Selections, select none5.
Effects, Image effects, seamless tilling, setting: Default
Adjust, Blur, radial:
Layers, merge all
Effects, edge effects, enhance more6.
Right click in the layers palette, Promote background layer
7.
Layers, new raster layer
Fill with dark colorLoad the mask NarahsMasks_1724
Layers, new mask layer, from image, invert checked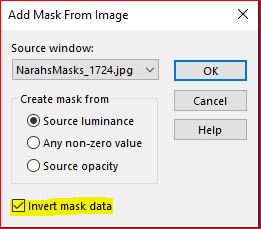
Layers, duplicate
Edit/ repeat duplicate
we must have 3 times the mask: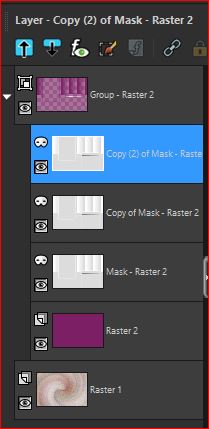
Layers, Merge groupe
8.
Layers, properties, Blend mode Multiply( or another one, depending on your colors, you should see the layer below )
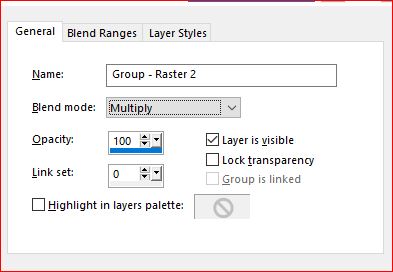
9.
Selections , load a selection from alpha channel, sélection 1

Load the misted landscape , copy
*paste as a new layer10.
Activate the move tool (M), place the part of the misted that you want to save, inside the selection
Selections/ Invert
DELETE
Selections/Invert
Selections, Modify, Select the selection borders:
Fill in white
Effects, textures effects , weave, dark color:
Effects 3D, drop shadow 0 / 0 / 75 / 25 , Black

Selections , select none
11.
Selections, load a selection from alpha channel, sélection 2
Edit paste as new layer (memorized landscape)
Place the part of the misted that you want to save, inside the selectionselections/ Invert
DELETE12.
Selections/ Invert
Selections, Modify, Select the selection borders: as before
Fill in white
Effects, textures, weave, as before
Effects 3D, drop shadow, as before
Selections, select none13.
Layers, merge down
layers, duplicate
On the layer below (original)
Effects, plugins: Unlimited - &<Bkg Kaléidoscope> Cake mix, how to opening
Layers, properties, Blend Mode, soft light, Opacity a 22 (adapt according to your colors)
14.
On the layer Raster 1
Effects, textures , Fur :
Adjust, sharpness, sharpen more
15.
On the second layer from the bottom
Layers, new raster layer
Selections, load a selection from alpha channel, sélection 3
Fill in white
Effects, plugins: (Filters unlimited or out of this one) Graphic Plus - Cross Shadow, how to opening
Effects 3D drop shadow, as before
Remove the selection16.
Current layers, like this: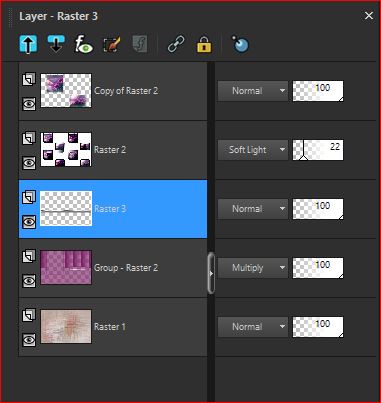
17.
Close the eye of the top layer of layers:
Layers, merge visibles
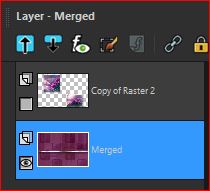
Duplicate
Effects, plugins: Mura's Meister - Perspective tiling:
Effects 3D drop shadow, as before
18.
Activate the top layer of layers, click on the eye to make it visible
Load the tube Deco
Edit/copy
*paste as a new layer
Effects, plugins: Alien skin eye Candy 5 Impact - Glass, setting clear no drop shadow
Effects, reflection effects, feedback:
19.
Selections, load a selection from alpha channel, sélection 4
DELETE
Remove the selection20.
Activate the pick tool ( K Key), place it:
Position X 676
Position Y 22
(Letter M to uncheck)
Duplicate
Image, Mirror, Mirror horizontal
Activate the pick tool (K Key), place it:
Position X 450
Position Y 178
( M)21.
Load the tube Deco2, copy
* paste as a new layer
Activate the pick tool (K key), place it:
Position X 648
Position Y 12
(M)22.
Duplicate
Image, free rotate, right, 90°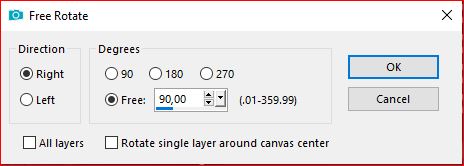
Activate the pick tool ( K key), place it:
Position X 135
Position Y 516
( M)23.
Sobre a layer merged
Effects , plugins: Unlimited , Vm Natural , Sparkles: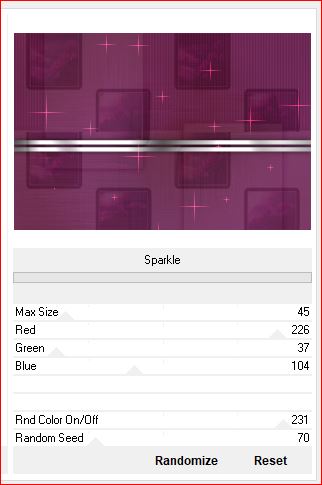
adapt to your colors
24.Layers, new raster layer
Fill in whiteLoad the mask Silvie_Masks_Deco_abstract
Layers, new mask layers from image: invert unchecked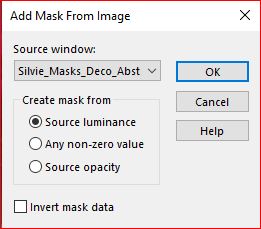
Duplicate
Merge group
Blend Mode, soft light25.
Effects, image effects, offset: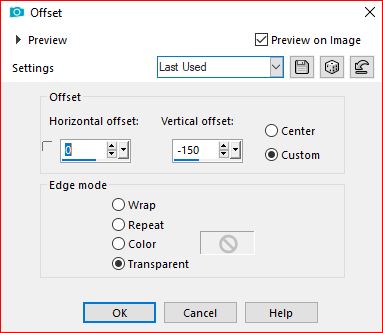
26.
current layers:
27.Image, Add borders, symmetric:
1 px white
5 px dark color
5 px white
5 px dark color
25 px white
28.Copy, once again, the woman tube
* paste as a new layer
Image, Resize at 85% , all layers uncheckedEdit/repeat resize
Put how about the final example
Apply the preceding drop shadow
Edit/repeat drop shadow
Adjust, sharpness, sharpen29.
Edit/Copy special, copy merged
* paste as a new layer
Resize a 20% all layers unchecked
Activate the pick tool (letter K), place it:
Position X 8
Position Y 410
(M)30.
Duplicate
Image, Mirror, Mirror horizontal
Activate the pick tool (letter K), place it:
Position X 738
Position Y 144
(M)
Layers, merge down
Effects 3D drop shadow: 0 / 0 / 100 / 35 black
Adjust, sharpness, sharpen31.
Sign and attach the author's watermark32.
Image, Add borders, symmetric: 2 px dark color
Image, Resize, width at 950 px
Adjust, sharpness, unsharp mask:
Save as jpeg
Translation:
 votre commentaire
 Suivre le flux RSS des articles de cette rubrique
 Suivre le flux RSS des commentaires de cette rubrique
Inédits de ma conscience


