-
Nena
This tutorial is by Béa
Thank you Béa, for allowing me to translate your tutorial
This tutorial is protected by copyright
The material provided is protected by the authors of the tubes
It is prohibited to appropriate or modify the original and / or signatures.
Any dissemination without written authorization is prohibited.
Original Tutorial: On Here
Version according to the original:

My version: tubes by Nena Silva, Thank you

Material: On here
Note: remove tube signatures before using them
Plugins:
Andromeda - Ap Lines - Ap Distort -
Carolaine and Sensibility - Mura's Meister -
Graphic Plus - Unlimited
Guide:
1.
Original colors:
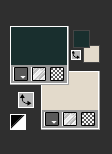
In Materials, place the colors :
Foreground, Color 1 #1a2f2e (dark)
Background, Color 2 #e3dacb (light)2.
Load the file Alpha_Nena
Window/duplicate, close the original and work on the copy3.
Load the woman tube
Edit/ Copy
*On your work : Selections, Select all
Edit/paste into selection
Selections, select none4.
Effects, Image effects, seamless tilling, setting: Default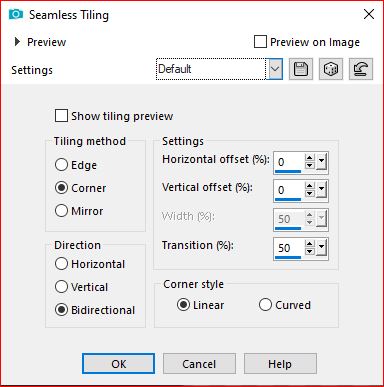
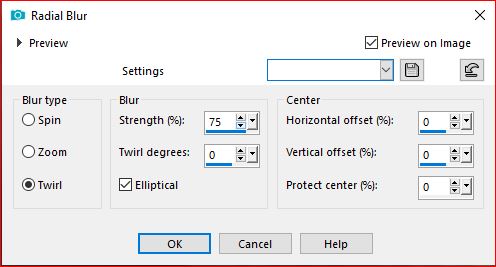
Adjust, Blur, radial:
Layers, merge all
5.
in the layers palette, on this layer, right click, promote background layer (= raster 1)
Effects, Edge effects, enhance more
6.
Selections, load a selection from alpha channel, load the sélection 1
Selections , promote selection to layer
Effects, plugins: Carolaine and Sensibility - Cs-LDots:
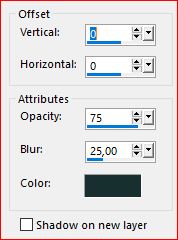
Effects 3D drop shadow: 0 / 0 / 75 / 25 color 1
Selections, select none
7.
Effects, Image effects, seamless tilling, Default8.
On the Raster 1 layer
Selections, load a selection from alpha channel, load the sélection 2
Selections, promote selection to layer
Effects , plugins: Ap Lines - Silverlining:
Effects 3D drop shadow, as before (memorized)
Select none
Effects, Image effects, seamless tilling, Default9.
On the Raster 1 layer
Selections, load a selection from alpha channel, load the sélection 3
Selections , promote selection to layer
Effects , plugins: Ap(distort) , Distort-Lineup, how to opening:
Effects 3D , drop shadow, as before
Select none
Effects, Image effects, seamless tilling, Default
Layers, merge visibles10.
Effects, plugins: Unlimited - &<Bkg Kaleidoscope> - 4 QFlip UpperL: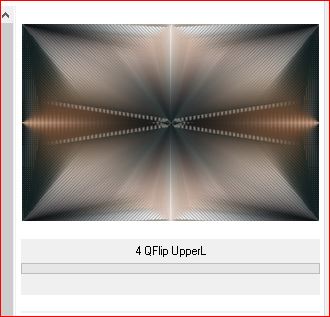
11.
Layers, new raster layer
Fill in color 2Load the mask NarahsMasks_1775
Layers, new mask layer from image

Layers, merge group
12.
Effects , reflection effects, Rotating mirror :
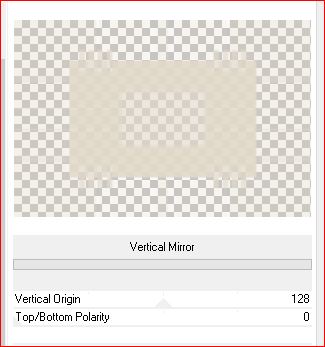
Effects, plugins: (unlimited or off this one) Graphic Plus - Vertical mirror:
Layers, propreties, blend mode, soft light
13.
Selections, load a selection from alpha channel, load the sélection 4
Load the Nena misted landscape, copy
* Paste as a new layer
Selections/ Invert
DELETE
Selections/Invert
Selections, Modify, Select the selection borders: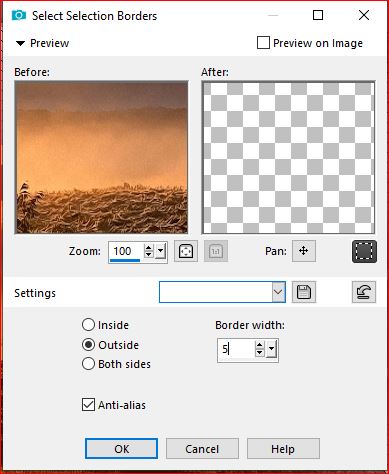
14.
Layers, new raster layer
Fill in color 2
Effects , textures effects, Weave, Color 1:
Effects 3D drop shadow, as before
Select noneLayers, merge down
15.
On the merged layer
Effects, plugins: Graphic Plus - Cross Shadow, how to openning
Layers/duplicate
Effects , plugins: Mura's Meister - Perspective tiling: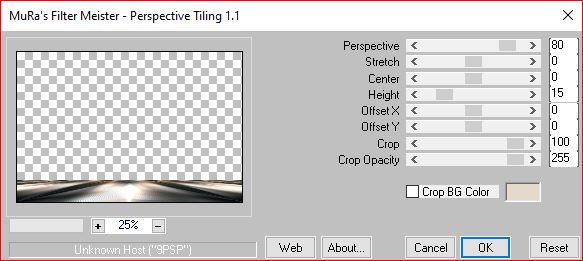
Adjust, sharpness, sharpen more
Effects 3D drop shadow, as before
16.Left click on the eye, next to this layer, to close (visibility toggle)

About another layer :
Edit/ Copie special/Copy merged
Edit/paste as a new image (put aside)17.
Click once again about the eye of the previus Layer (to open)layers, merge visibles
Layers, Duplicate
Image, Resize at 85% all layers unshecked
Selections, select all, float, defloat
Selections , Modify, Select the selection borders, as before
Fill in color 2
Effects, textures, weave , as before
Effects 3D drop shadow, as before
Select none18.
Effects, plugins: Andromeda - Perspective:

Activate the pick tool " K Key" , place it:
Position X 0
Position Y 34
M Key to remove the selection19.
Effects, reflection effects , rotating mirror, as before20.
Activate the image you left aside
Image, resize at 15% all layers unshecked
Effects , plugins: Alien skin eye Candy 5 Impact - Glass - Settings Clear
Edit/Copy
* paste as a new layer
Activate the pick tool "K" , place it:
Position X 60
Position Y 3221.
Layers, Duplicate
With the pick tool "K" , place it:
Position X 692
Position Y 462
(M)22.
On the woman tube , copy
* paste as a new layer
Image, Resize at 85%, 2 times, all layers unshecked
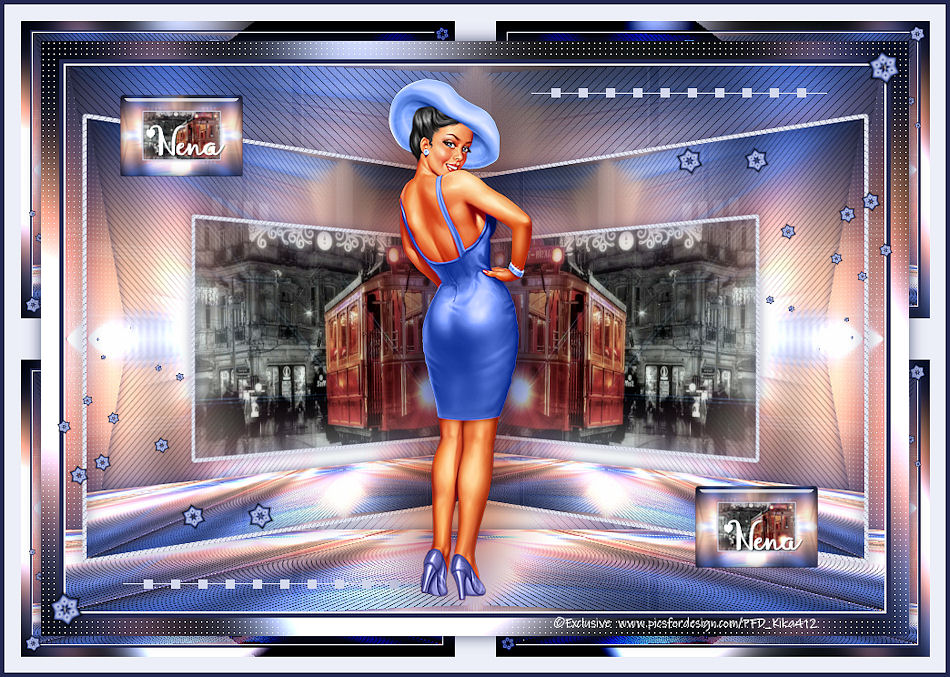
Put as on the final example
Adjust, sharpness, sharpen
Layers, duplicate
On the layer below (the original)
Adjust, Blur, gaussien blur, radius at 35
Layers, propreties, Multiply
23.
On the copy of Raster 2 layer (little frame)
Load the Deco tube, Copy
* paste as a new layer
To change the color: Select all - float - defloat - fill with color 2 or white24.
Image, Add borders, symmetric:
2 px Color 2
5 px Color 1
Selections, Select all25.
Image, Add borders, symmetric:
20 px Color 2
Effects, Image effects, seamless tilling, setting: Default
Selections/Invert
Adjust, blur, gaussien, as before
Effects, plugins: Graphic Plus - Cross Shadow , how to opening
Edit/ repeat - Cross Shadow
Effects, plugins: Carolaine and Sensibility - CS-LDots, as before
Select none26.
Load the Deco_coins tube
With the change color tool, colorize as your liking, copy
* Paste as a new layer27.
Image, Add borders, symmetric: de 45 px color 2
With the magic tool, select this border
Effects, plugins: Unlimited - &<Bkg Kaleidoscope> Cake mix , how to opening
Selections /Invert
Effects 3D drop shadow, as before
Select none28.
Load the title, "titre" tube, copy
* paste as a new layer29.
Layers, new raster layer
Fill with color 1
Selections, Select all
Selections, Modify, Contract at 5
DELETE
Select none30.
Sign and add the author's watermark
Layers, merge all
31.
Image, Resize width at 950 px
Adjust, sharpness, unsharp mask, setting: SoftSave as jpeg
Thank you Kika
 votre commentaire
Inédits de ma conscience


