
-
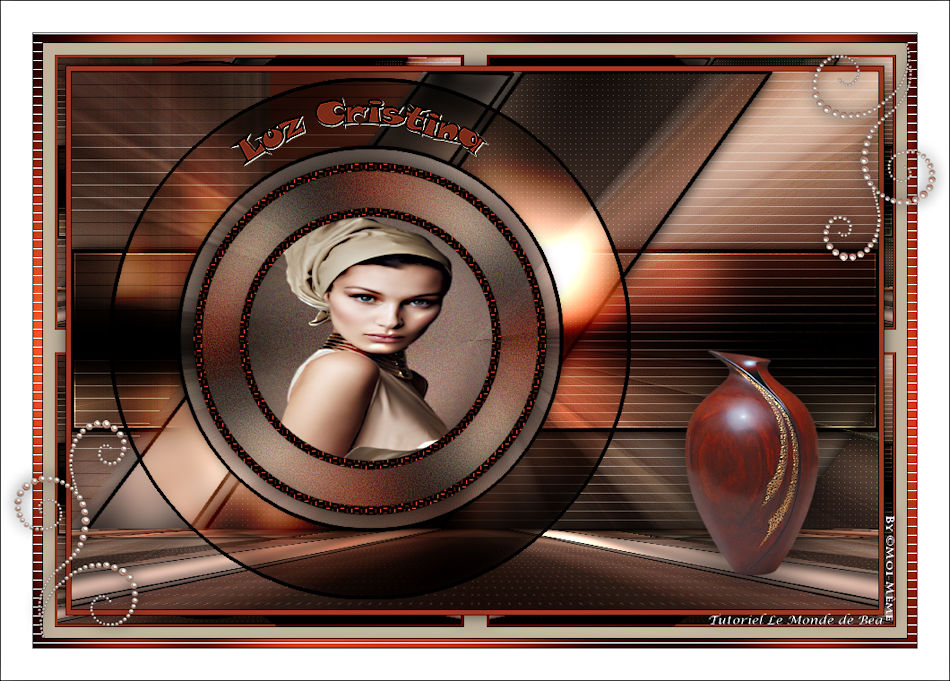
Luz Cristina

Este tutorial é da Autoria de Béa

Obrigada Béa, por me autorizar a traduzir o seu tutorial em português
Este tutorial é protegido por copyright
O material fornecido é protegido pelos autores dos tubes
É proibido de se apropriar ou modificar o original e/ou as assinaturas.
É proibido qualquer difusão sem autorização escrita.
Tutorial Original AQUI
Versão conforme ao original:

A minha versão: tube de Luz Cristina, vaso de wieskes, Obrigado
Material: AQUI
Roteiro:
1.
Cores originais:

cor 1 #ffd9b9
cor 2 #b00606
cor 3 / preto2.
Carregar o ficheiro Alpha_LuzCristina
Window/Duplicate
Fechar o original, trabalhar sobre a copia3.
Preencher de preto
Layers, new raster layer (juntar uma nova layer)
Carregar o tube mulher
Edit/ Copy
*Sobre o seu trabalho:Selections, select all
Edit/paste into selection
Selections, select none (remover a seleção)4.
Effects Image effects, seamless tilling, setting: DefaultAdjust, Blur, radial

Layers, merge visibles
Effects , Edge effects, enhance more5.
Selections, Load a selection from alpha channel, sélection 1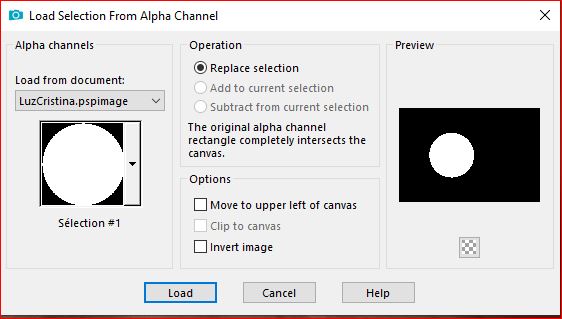
Selections , promote selections to layer
Adjust, Blur, gaussien, radius a 30
Effects , Textures, Grain:
6.
Juntar uma nova layer
Volte sobre o tube mulher , copy
* paste into selection
Remover a seleção7.
Colocar a cor 1 em foreground e a cor 2 em background
Selections, Load a selection from alpha channel, sélection 2
Juntar uma nova layer
Effects, plugins: Mehdi - Wavy lab 1.1: preto na casa 3
Adjust, Blur, Gaussien, radius a 30
Effects, Textures , Grain como antes
Sharpness, sharpen more8.
Selections, Modify, Select the selection borders:
Juntar uma nova layer
Preencher de preto
Effects, textures, weave, Cor 2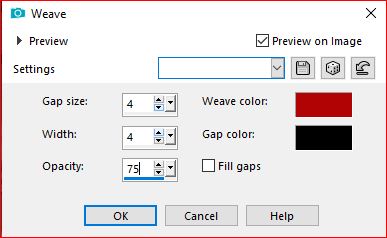
Sharpness, sharpen more
Remover a seleção9.
Layers, merge down, 3 vezes !!
Effects 3D drop shadow 0 / 0 / 75 / 25 preto
Sobre a layer Merged
Selections, load a selection from alpha channel, selection 3
Selections , Promote selection to layer
Effects 3D drop shadow, como antes10.
Sobre a layer merged
Selections, load a selection from alpha channel, sélection 4
a nova seleção substitui a anterior
Selections, promote selection to layer
Layers, arrange, move up
Adjust, blur, gaussien a 10
Effects, plugins: Graphic Plus - Cross Shadow , como à abertura11.
Selections, Modify , select the selection borders
Preencher de preto
Remover a seleção
Layers, propreties, Blend mode, hard light12.
Sobre a layer Merged
Selections, load a selection from alpha channel, sélection 5
Selections , Promote selection to layer
Effects, plugins: L&K - Mayra
Effects 3D drop shadow como antes
Remover a seleção
Layers, propreties, Blend mode, soft light13.
Sobre a layer merged
Selections, load a selection from alpha channel, sélection 6
Selections , promote selection to layer
Effects, plugins: Carolaine and Sensibility - Cs-LDots: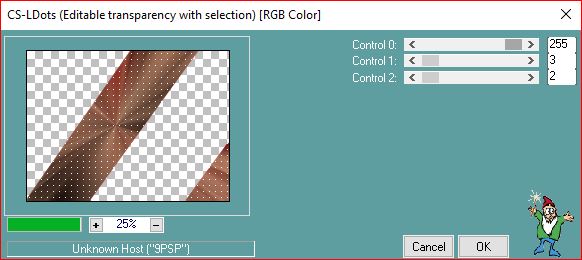
Effects 3D , drop shadow, como antes
14.
Selections, Modify, select the selection borders:Preencher de preto
Remover a seleção
Layers, propreties, Blend mode Multiply15.
Sobre a layer Merged
Selections , load a selection from alpha channel, sélection 7
Selections , promote selection to layer
Effects, plugins: Ap Lines - Silverlining:
Remover a seleção
Layers, propreties, Blend mode soft light16.
Sobre a layer merged
Selections , load a selection from alpha channel, sélection 8
Selections , promote selection to layer
Adjust, Blur, gaussien radius a 10
Effects, plugins: Graphic Plus - Cross Shadow , como à abertura
Effets 3D drop shadow como antes17.
Selections, Modify, select the selection borders: como antes
Preencher de preto
Remover a seleção18.
Sobre a layer merged
Ativar a selection tool (S), custom selection:
Selections, promote selection to layer
Adjust, Blur, gaussien a 10
Effects, plugins: Graphic Plus - Cross Shadow , como à abertura
Effects 3D , drop shadow, como antes19.
Selections, Modify, select the selection borders: como antes
Preencher de preto
Remover a seleção
Layers, propreties, blend mode, Overlay
Effects, Edge effects, Enhance more20.
Layers (print da autora) :
Fechar (sem activar) o olho das 3 layers circulo (como acima no print)
Layers, merge visibles
21.Duplicar esta layer
Effects, plugins: Mura's Meister - Perspective tiling:
Effects, reflection effects, rotating mirror :

Effets 3D Drop shadow 0 / 0 / 100 / 100 preto
22.
Ativar a layer do topo das layersLayers - vieux - all
Carregar o tube vase fleur de Luz Cristina, copy
* paste as a new layer
Image, resize a 50% , all layers desmarcado
Colocar em baixo à direita
Effects 3 D, Drop shadow como antes23.
Carregar o tube titre, copy
* Paste as a new layer
Colocar dentro do circulo, como sobre o exemplo final(para mudar a cor: select all, float, defloat, contract de 2, preencher com a cor de sua escolha, remover a seleção )
24.Selections, select all, float, defloat
Effects 3D drop shadow 1 / 1 / 50 / 1 cor 1
Remover a seleção
Adjust, sharpness, sharpen25.
Image, Add borders, symmetric:
1 px preto
5 px cor 2
1 px preto
Selections, select all
Image, Add borders, symmetric: 25 px de cor 1
Selections, Invert
Effects, plugins: Unlimited - &<Bkg Kaléidoscope> Cake Mix , como à abertura
Selections, Invert
Effects 3D drop shadow 0 / 0 / 65 / 25 preto
Remover a seleção26.
Image, Add borders, symmetric:
1 px preto
10 px cor 2
1 px preto
Ativar a magic tool, Selecionar a borda de 10 px
Effects, plugins:Graphic Plus , Cross Shadow , como à abertura
Ap Lines - Silverlining como antes:Effects 3D , drop shadow, como antes
Remover a seleção27.
Image, Add borders, symmetric: 35 px branco
Carregar o tube Deco 68 de Luz Cristina, copy
* paste as a new layer
Image, Resize a 40% all layers desmarcado
Image, Mirror, vertical
Colocar no canto superior direito (ver o exemplo final)
Effects 3D drop shadow 0 / 0 / 75 / 25 preto28.
Duplicar esta layer
Image, Mirror, horizontal
Image, Mirror, vertical29.
Assinar e juntar o watermark da autora30.
Image, Add borders, symmetric: 1 px preto
Image, Resize, width a 950 px
Adjust, sharpness, unsharp mask, setting: softSalve em jpeg

 votre commentaire
Inédits de ma conscience
-
O crédito das imagens utilizadas
pertence ao devido Autor
Os meus tutoriais e traduções são protegidos por:

Interditos de qualquer difusão sem a minha autorização
Agradeço o respeito por o meu trabalho.

-


