-
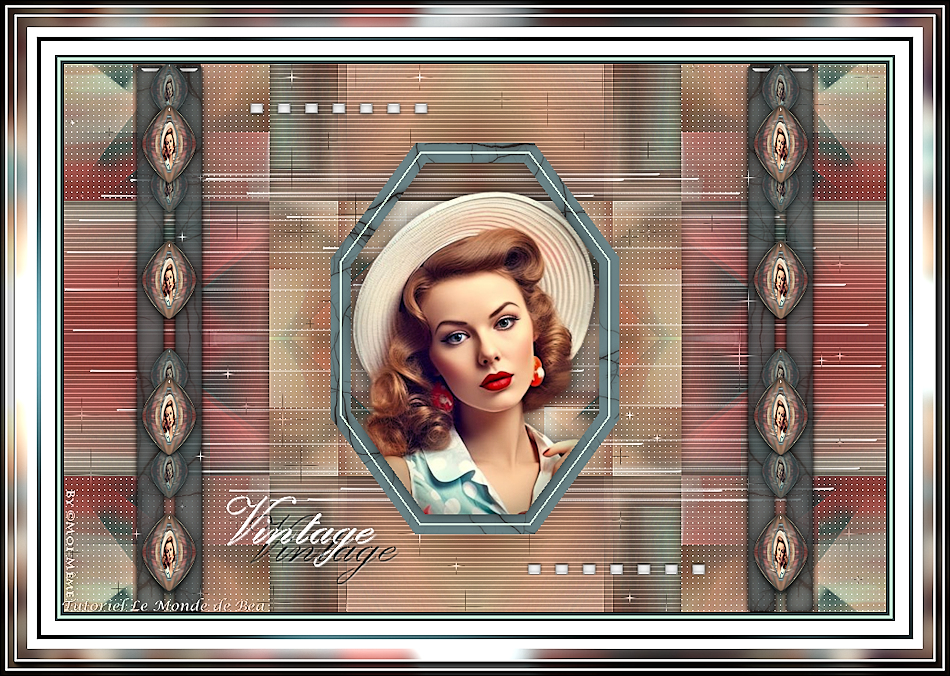
Vintage (pt)
Vintage

Este tutorial é da Autoria de Béa

Obrigada Béa, por me autorizar a traduzir o seu tutorial em português
Este tutorial é protegido por copyright
O material fornecido é protegido pelos autores dos tubes
É proibido de se apropriar ou modificar o original e/ou as assinaturas.
É proibido qualquer difusão sem autorização escrita.
Tutorial Original AQUI
Versão conforme ao original :

A minha versão tube de EMA, obrigado
Material AQUI
Plugins:
Alien skin eye Candy 5 Textures , e Impact
Carolaine and Sensibility
Graphic Plus
Unlimited: Bkg Kaleidoscope
AAA Frames
Para os plugins, , se necessário, Link fornecido sobre 0 tutorial original
Cores originais:

1.
Foreground/ cor 1 #deb5b4
Background/ plan cor 2 #4c171d2.
Carregar o ficheiro Alpha_Vintage
Window/duplicate, fechar o original, trabalhe sobre a copia3.
Carregar o tube mulher " de Louise" ou o seuEdit/copy
Sobre o seu trabalho: selections, select all
Edit/paste into selection
Remover a selecção (select none)
Effects, Image effects, seamless tilling , setting: Side by Side
4.
Adjust, blur, radial blur:
Layers, merge all
5.
Na paleta materials/layers, promote background layer
Effects, edge effects, enhance more
6.
Effects, Mehdi, Sorting tiles:
Adjust, sharpness, sharpen more
7.
Layers, new raster layer (juntar uma nova layer)
Preencher com a cor 2carregar o mask NarahsMasks_1538
Layers, new mask layer from image:
Layers, merge groupe
8.
Adjust, sharpness, sharpen more
Effects 3D, drop shadow, 0 / 0 / 65 / 25 Cor 2
Effects , User defined filter, Emboss 3

Layers, merge visibles
9.
Layers, Duplicate (duplicar esta layer)
Image, Resize a 50% , (all layers desmarcado)
Effects, Image effects, seamless tilling, setting: Default10.
Effects, plugins: Carolaine and Sensibility - Cs-LDots
Effects 3D , drop shadow, como antes, mas de cor preta

11.
Sobre a layer abaixo (merged)
Effects, plugins: Carolaine and Sensibility - Cs-texture, como à abertura
Layers, merge visibles
12.
Effects, plugins: Unlimited - &<Bkg Kaleidoscope> - Kaleidoscope Persian, como à abertura
13.
Juntar uma nova layer (Layers, new raster layer)
Selections , load a selection from alpha channel, sélection 1
(fill tool) Preencher com a cor 2
Selections , modify, contract de 10
Preencher com a cor 1
Selections, modify, contract de 2
Preencher com a cor 2
Selections , modify, Contract de 10
DELETE14.
Copiar de novo o tube mulher
*Sobre o seu trabalho : paste as a new layer
Image, resize 1 vez a 45% e mais uma vez a 85% , (all layers desmarcado) adapte ao seu tube
Colocar dentro da selecção, ver o exemplo final
Selections /invert
DELETE15.
Selections /Invert
Juntar uma nova layer
Effects 3D , cutout: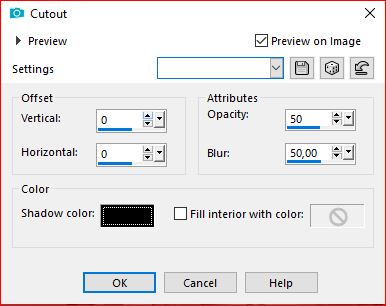
Remover a Selecção
16.
Sobre a layer abaixo: aplicar a drop shadow, como antes
Sobre a layers baixo (moldura)
Layers/duplicate
Effects, plugins: Alien skin eye Candy 5 Textures - Marble:
Layers, properties, Blend Mode, soft light
17.
Fechar a layer merged(na paleta layers, clica sobre o olho )
Layers, merge visibles
Activar e Reabrir a layer merged (clica para que o olho fique visível)18.
Carregar o tube Deco, copy
*paste as a new layer
Duplicar esta layer
Layers, merge down
Effects 3D , drop shadow, 0 / 0 / 100 / 100 preto19.
Effects , plugins: Mura's Seamless - Emboss At alpha , como à abertura
Blend Mode, screen
20.
Juntar uma nova layer
Selections , Load a selection from alpha channel, sélection 2
Preencher com a cor 2
Remover a selecção21.
Effects, plugins: Unlimited (ou fora deste), Italian Editors Effect - Effetto Fantasma:
Duplicar esta layer
Effects , plugins: Alien skin eye Candy 5, Textures , Marble como antes
Blend Mode, soft light
Layers, merge down
Effects, plugins : Alien skin eye Candy 5 Impact - Glass , setting: Clear
Effects 3D, drop shadow 1 / 1 / 50 / 2 preto
Repetir a drop shadow em negativo: -1 / -1 / 50 / 2 preto22.
Duplicar esta layer
Image, Mirror, mirror horizontal
Merge down23.
Layers actuais:
Layers, arrange bring to top
24.Layers, merge visibles
Duplicar esta layer
Effects , geometric effects, Circle :
Edit/repeat/circle
Image, resize a 15% (all layers desmarcado)
Effects , plugins: Alien skin eye Candy 5 Impact - Glass, como antes25.
Activar a pick tool "K", colocar:
Position X 78
Position Y 40
(Tecla M para desmarcar)
Effects, plugins: Mura's Meister - Copies(print original)

Adjust, sharpness, sharpen more26.
Duplicar esta layer
Image, Mirror, mirror horizontal
Merge down
Effects 3D, drop shadow: 0 / 0 / 65 / 25 preto27.
Carregar Deco2, copy* paste as a new layer
Pick tool "K", colocar:
Position X 200
Position Y 40
(M)28.
Sobre a layer merged
Carregar Etoiles, copy*paste as a new layer
Blend Mode Luminance (legacy)
Adjust, sharpness, sharpen29.
Carregar titre, copy
*paste as a new layer
Colocar em baixo à esquerda (ver final)30.
Image, Add borders, symmetric:
1 px preto
3 px Cor 2
3 px Cor 1
3 px Cor 2
15 px Branco
5 px Cor 231.
Com a magic tool , seleccionar esta borda de 5 px
Effects, plugin: Graphic Plus - Cross shadow , como à abertura
Edit/repeat/ Cross Shadow
Remover a selecção32.
Image, Add borders, symmetric:
10 px Branco
Select all33.
Image, Add borders, symmetric:30 px Blanc
Effects, Image effects, seamless tilling, setting : Default
Selections / Invert
Adjust, Blur, gaussien, radius a 10
Effects , plugins:Graphic Plus , Cross Shadow , como à abertura
AAA Frames, Foto Frame:
34.
AAA Frames, Foto Frame , novos dados
(print original)

Remover a selecção
35.Assinar e juntar o watermark da autora
Merge all36.
Image, Resize, width a 950 px
Adjust, sharpness, unsharp mask, setting: softSalve em jpeg
Tradução por:

-
Commentaires
Inédits de ma conscience
-
O crédito das imagens utilizadas
pertence ao devido Autor
Os meus tutoriais e traduções são protegidos por:

Interditos de qualquer difusão sem a minha autorização
Agradeço o respeito por o meu trabalho.

-