-
Natural (GB)
Natural

This tutorial is my own, any resemblance to another tutorial is just pure coincidence.
Forbidden to share without my permission.
Autorizations
Tubes, masks, backgrounds, decorations ,WA
Plugins:
On Here
the credits of the images used,
belong to the appropriate authors
My tutorials are protected:
Thank you tubers
Tube de: Graphics Béatrice (GB)
Decorations , WA: from me
others to be done during the tutorial
Unlimited :
kang
Background Designers IV
......
Italian Editors effects
AAA Frames
Transparency (eliminate black)
General preparation: Before starting one of my tutorials
This tutorial was created with PSP 2020, can be done with previous versions,
The alpha channel is compatible with pSP7
If you can't open alpha channel: Place the selections in your PSP selections folder
Place the PSP scripts and gradients in the corresponding "regulated" folder.
Most of my filters are in Unlimited, check the filter folder, some work outside of it.
Open the mask on the PSP.
Duplicate the material and work on the copies.
Remove signatures from tubes before use
Double click on presets
 , they will be installed automatically
 You can adapt the colors, the Blend mode of the layers, to your work
Material:(depending on the chosen tube, the background effect may change, adapt the mixing modes of the layer according to your work)
Initial dimensions 900x600 px
Colors:
choose according to your tube
My colors:
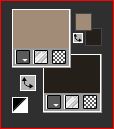
Foreground: cor 1: #a28c77
Background: cor 2: #26201a
1/
Load the canal_alpha Natural
fill with color 1
Selections , select all
Load the character tube (woman)
About the same: Image, Rotate left
(Leave it open on your PSP for the rest of the tutorial)
Edit, Copy
About your work: paste into selection
Selections, select none
2/
Adjust, Blur, radial:

Adjust Blur, motion blur : left strong

Effects, Edge effects, enhance more
3/
Layers, Duplicate
Effects plugins: Unlimited, kang, Houdini is only sleeping:

4/
Apply the plugin: Transparency, Eliminate black
Edge effects, enhance
Image, resize a 60%, all layers unshecked
Effects 3 D , drop shadow: 0/0/60/20 black
5/
Effects, Image effects, seamless tilling, side by side
Apply the plugin: Unlimited, Background Designers IV, sf10 Slice N Dice:

Image, mirror, mirror horizontal
Adjust, sharpness, sharpen
(ou, se suas cores forem muito claras: edge effects enhance)
Layers, propreties,Blend mode Overlay
6/
Activate the layer raster 1
Selections, load a selection from alpha channel, sélection 1
Promote selection to layer
Layers, arrange, move up
Apply the plugin: Kang, Houdini is only sleeping: how to open

Selections, modify, select borders of selection :

Juntar uma nova layer
fill with color 1
Effects 3 D, Inner Bevel:

Adjust, Sharpness, sharpen
Remover a seleção
Layers, merge down
Apply the drop shadow as memorized (as above)
7/
Selections, load a selection from alpha channel, sélection 2
DELETE
Keep selected
8/
Layers, new raster layer
Load/Copy the image Natural texture
about your work: paste into selection
Adjust, Sharpness, Sharpen
Effects 3 D, Inner bevel , as memorized
Adjust, move down
Select none
9/
Activate the layer below
Merge down
Selections, load a selection from alpha channel, sélection 3
Promote selection to layer
Select none
10/
Image, resize a 40%, all layers unshecked
Place as in the final example or use the pick tool K (K key to activate) :
position: X 181, Y 325
Layers, duplicate
Place with pick tool K
position: X 181, Y 465
Merge down
Adjust, sharpness, sharpen
(M key or other tool to disable the K tool)
11/
Layers, Duplicate
Image, mirror, mirror horizontal
Image, mirror, mirror vertical
Merge down
Effects 3D, drop shadow, as memorized
12/
Lod the déco "boutons", copy
About your work: Paste as new layer (it is in its place)
Effects 3D drop shadow, as memorized
Merge down 2 x
Overview of current layers:

13/
Load the déco_Natural1
Copy/paste as a new layer
Layers propreties, Blend Mode, screen
Move down
14/
Activate the layer Raster 1
Load the déco 3_naturel, copy/paste as a new layer
Blend Mode, Multiply
(adapt to your work)
Effets 3 D, Drop shadow, as memorized
15/
Activar a layer Raster 1
Layers, Duplicate
Layers, Arrange , bring to top
Select all, modify, contract at 15
DELETE
Keep selected
16/
Selections, invert
Effects textures, Weave, colors 1 and 2:

Edge effects, enhance
Keep selected
17/
Selections, invert
fill with color 1
Contract at 5
DELETE
fill with color 2
Contract at 5
DELETE
Select none
18/
Activar a magic wand tool, seleccionar a borda de 5 px color 1
Effets 3 D ,Inner bevel, as previously
Select none
19/
About the layer below
Layers, new raster layer
Selections, select all
Effects, 3D, Cutout :

Select none
20/
Layers, duplicate
Image, mirror horizontal
Merge down
Effets 3D, drop shadow as memorized
Overview of current layers:

21/
About the Raster 1 layer:
Apply plugin: Unlimited, Background Designers IV, sf10 Slice N Dice

Apply plugin: It@lian Editors effect, Effetto fantasma : data at 6/4

Adjust, Sharpness, sharpen more
22/
Image , add borders, symmetric :
1 px color 2
20 px de color 1
Apply plugin: AAA frames, Foto Frame:

23/
Activate, the tube character you left out
Image, Rotate right
Edit, Copy
Activate the top layer of the layers
Paste as a new layer
Image, Resize a 55 %, all layers Unshecked
Place as in the final example
(or: objects, align, bottom)
Effets, 3D drop shadow, as memorized
24/
Load the WA_ natural , copy/paste as a new layer
Effets 3D drop shadow, as memorized
(colorize in according to your colors)
25/
Sign
Add my watermark (blend mode soft light)
26/
Image add borders 1 px color 2
Adjust, sharpness, unsharp mask

Save as JPG/jepg
contact
My version 2, tube de: Gabry,thank you!

Merci Béa pour avoir testé ce tutoriel
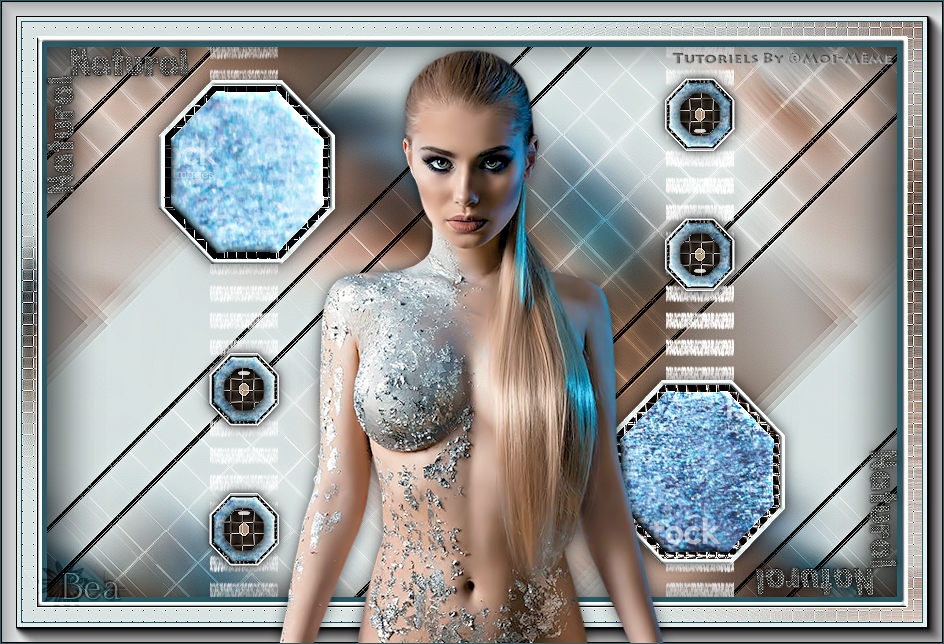
Merci Alyciane pour avoir testé ce tuto

-
Commentaires
Inédits de ma conscience


